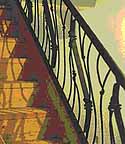
 |  LEFT:'Undersea' newel post ABOVE:'Kelp' railing layout |
This is my layout for the next element on the Reade / Maxwell project. This is the terminal post for the diagonal railing that runs down to the basement.
In the overall series of designs, the concept has been 'Sea to Shore to Sky'. Inside the concept, I have been repeating the use of certain forming techniques and physical shapes. One of these is the use of angle - heavily reforged into organic forms.
The first idea I had using this material was the 'kelp' element seen on the layout for the diagonal railing seen above. One end of the material is carefully forged into a roughly oval 'stem'. The other is flattened, then here is formed into a series of reversal curves. At this point it has not been decided if the individual elements will be mounted as shown (mass down) or more like natural kelp (with the reversal curves topmost). To the point of this discussion on rendering, you will note that I used some hoodoo with Photoshop to produce the illustration - rather than tying to hand draw it.
For the newel post, the idea I had was something that suggested a whirlpool in the water. I had also wanted to have the element to spread over the basement floor. In the final design (though yet to be approved by the clients) a bundle of four of the kelp stems rise from the floor. About half way up, these flatten to leaves, which spread out then swirl into a spiral cylinder.
Ok - now the rendering. I have been carrying that design around in my head for a good month. I have been rollling the possibilities of the forms, both as individual elements and as the final combination around in my imagination. Coupled with the raw design has to come a consideration of the technical aspects. You could easily imagine an object that in end you just could not physically make!
That illustration (poor as it is) is the result of many hours of pondering. It took me roughly an hour to actually draw. Even still, it certainly is NOT a photographic or even a plan view of what the actual element will look like when it is finished. Hopefully it is detailed and accurate enough for the client to undertand. I myself do not really require a drawing, as that long considered object is firmly planted, in considerably greater detail, in my mind.
 |  |  |
| First rough concept drawing | Customer Layout | As forged and assembled |
I want to stress this last. An true artisan blacksmith will be balancing imagination and technique in each design. They also will not be slaves to the established layout. The final shape of any object is a result of a force vectors applied to the metal by the combination of each individual hammer blow. This may be the end product of hundreds of individual strokes. Yes, and experienced blacksmith should be able to both predict and control the shaping of a metal bar. The 'art and mystery' comes from working with the developing dynamic process, of knowing when to force the material to your intended design - and just as importantly, when to 'let it go'. Sometimes the metal just wants to be a different shape.
The three images above show both an object that shifted during its creation process in just this way. More importantly, the two illustrations and the finished object also indicate another important aspect of creating original art metalworks for a client. No mater how great your ideas, you do have to be able to communicate to the customer!
This is my design to finial creation of the upper newel post at the head of this same set of stairs to the basement. Here the theme is 'shore', with stylized rushes making the railing uprights. The first illustration is my own thumbnail for the newel post. It needs only be extremely rough, as the full object exists in my imagination, and this is more than enough to remind me of my intentions. Although many hours lay behind that drawing, it only took a few minutes to sketch it out. The second drawing is clearly more refined, and is the layout illustration I presented to the client to communicate my ideas. You will see it includes some technical notes, on stock sizes, forming steps, and the like. When I sent this illustration to the client, it was accompanied by a full page of written description, in even more detail than the illustration. The last image shows the element as it was finally produced (here welded to the associated hand rail and ready for paint). As you look at the sequence, you can clearly see how my original concept was refined and modified though the process. Although the exact lines of the customer layout are not duplicated in the final forging, it is clear that the illustration does represent that object.
One final note: I have just spent a further two hours (!) writing and formatting this blog post. Why?
One of the aspects of working with a client on any custom art work (especially one as large as the current Reade/Maxwell project) is communications. I balance the inaccuracies of my simple style of layout drawings with considerable effort in informing the customer just what is happening here in the shop. For this project this has included not only phone calls and private e-mails on a weekly basis, but regular commentaries on the work in progress, including video clips (posted to YouTube and duplicated here). For this project, this all has proved to be the ideal way to keep the customer 'in the loop' as I continue to work (and eat up their considerable deposit funds!)


1 comment:
Its largely why I have an armouring blog at all....to keep the customer in the loop as complex items are coming off the bench.
Of course, its also nice when random people drop in, and comment, not always favorably, but always with feeling.
Post a Comment