Saturday, June 26, 2010

Currency Bar from DARC Iron

A general feeling was that we should have at least one completed 'currency bar' made up for the L'Anse aux Meadows presentation - that was formed from iron we had smelted ourselves. There was one completed billet of iron on hand. Unfortunately there are some gaps and errors in the records, so not as much information can be gained as was hoped.

INITIAL SMELTING

Date : November 12, 2005 (note that earlier records show this as 'October 2005'
Experiment :13/D7 (detailed notes on the DARC Iron series)
Location : Wareham, ON
Team : DARC
Furnace: Norse Short Shaft
- clay cob with stone slab support
- tap arch
Note - reuse of furnace from June 05
Size : 25 cm x 60 H
Source : suggested by earlier experiments
Tuyere : 25 mm ID ceramic kiln support
Placement : 16 cm from base
- about 5 cm in from wall
- angle at 20 down
Bellows : vacuum blower
Air : 600 l / min (estimated)
Charcoal : 79.5 kg broken hardwood
Consumption : about 2 kg charcoal every 10 minutes
Ore : Stelco taconite + Virginia Rock Ore
17 kg (roasted)
Sequence : ore added in variable sequence (7 - 10 min)
as small charges .75 - 2.25 lbs
Duration : about 6 1/4 hours (not including preheat)
Result : 4.3 kg bloom
Yield : 22 %
Notes : - Successful creation of historic sized bloom
- Success in patching and re-firing furnace

BLOOM TO BAR


My notes list an undated effort to forge down a portion of the November 2005 bloom. These seem to indicate the main part of the bloom was cut into two sections, one at 1.70 kg, one at 1.86 kg, the remainder of the mass as smaller fragments. The 1.70 kg piece was forged down into the working bar seen above. The notes list the resulting bar at roughly 2 x 3 by 34 cm, but do not give the finished weight.


This is the completed currency bar. The finished weight is 895 gms. The size is in the range of the artifact samples : 15 x 15 mm (widest portion 18 x 18) by 525 mm long.


This is a close up of the flattened end of the bar. The 'paddle' is 110 mm long, and roughly 32 mm wide. It tapers slightly from 5mm thick at the base to 3 mm at the tip.


A close up of the bar end. I developed the runic mark seen for use on DARC replica objects. In five strokes it combines all the letters for DARC, both in Roman and Norse characters.

The starting billet could perhaps have used one additional consolidation weld. There is some cracking along the straight corners of the bar as a result. The flattening step held together very well however, a step added in the Viking Age as a quality check. Overall the quality of this bar is in the same range as I found when I created a set of replica bars for Parks Canada, using various antique wrought irons.

Replica Currency Bars - for L'Anse aux Meadows NHSC, 2001

Thursday, June 24, 2010

Vinland 4 - Full report available

The 4th of the Vinland series smelts, undertaken on June 12th, is now available:
http://www.warehamforge.ca/ironsmelting/LAM/Vinland4/report6-10.html

As described earlier here, this smelt was undertaken using all Viking Age equipments (including clothing) and methods. The only modern elements were necessary safety equipment (primarily eye protection).

Monday, June 21, 2010

Vinland 4 Smelt - Draft Report

On June 12, the Norse had come to Wareham and undertook an iron smelt.

The framework for the smelt was inside DARC's full dress rehearsal for our major presentation at L'Anse aux Meadows NHSC coming up in August. As most of you are sure to know (?) this is the site of the first iron production in North America, by the Norse circa 1000 AD. This smelt was undertaken using all Viking Age equipment and methods and in historic clothing (other than modern safety equipment).


Duplicating the physical layout of the 'Furnace Hut' uncovered at L'Anse aux Meadows.
Pierre on the bellows, Darrell checking the tuyere, Ken adding charcoal and ore.

Keeping to the archaeology of L'Anse aux Meadows, the furnace was built with 5 cm walls, made of 50 / 50 clay and sand mix. I had made up the first course of clay a bit too wet, so the whole furnace had slumped. The major effect was to produce a 'pot belly' shape. Although the furnace started at the 20 - 22 cm ID suggested by the archaeology, the sagging expanded the diameter right at tuyere level to closer to 28 cm. This was sure to effect air requirements. The air was provided by that special 'smelt sized' Norse style twin bellows I had made up. I think in fact that we had exceeded the amount of volume it could dependably produce. Certainly we have all seen that any reduction in air volume below the Sauder and Williams Magic Numbers results in reduced bloom yields.

We had big problems with cracking. I *did* expect this from not using any kind of organic material in the wall material. Generally we were able to reduce massive voiding of working gases by placing stone slabs around the outside of the furnace, and packing the gaps with 50/50 sand and ash mix. The problem with that stuff is that if too much of it runs into the cracks and into the furnace itself, it makes a lot of extra slag. We managed to get through the bulk of the smelt with only a single tapping off however.
The 'disaster' happened right near the end of the smelt. The last heavy charge (about 2 kg worth) had been added, and we had just started the burn down. The top of the charcoal had dropped down maybe 10 cm from the top, so that large charge might have gotten to just above tuyere level. There was a huge self tap out of one of those large cracks, I'd estimate at least a half the available liquid slag. Must have been at least a litre, maybe more (think a milk carton's worth).

This is where being tired did not help. I tried picking up the pieces of slag and re-cycling them back into the furnace. with the addition of a bit more charcoal to cover. The loss of slag had also significantly dropped the internal temperatures (of course!). I certainly did not help that by putting the 'just barely solid' - but colder, slag back into the furnace. We kept going with the burn down, till we were maybe 10 cm above tuyere and slag bowl.

Initial working of the bloom.

Of course when we pulled the bloom that we had, it really was not hot enough to forge effectively. Really it was closer to a bright orange than at welding temperature like it should have been. What we ended up with was a rough brick shape, but more mechanically compressed than really solid. The resulting piece was about 10 x 4 x 6 cm (2/3 the size of a pound of butter), with a lot of cracks. When I spark tested it, it appears to be nice low carbon material.
The good news on this is that this small bloom will prove relatively easy to handle for me when I go to try to forge it down into a bar.

What I really *should* have done was to have immediately cleared the furnace and pulled the bloom when the slag poured out - so at least the mass would have been at welding temperature.
My guess is that there was considerable iron contained in that last flow of slag. We had run virtually the same smelt last time, the only main difference was that the earlier furnace was cylindrical at 22 cm ID. With the same air set up, the same ore, the yield was closer to 25%.

The purpose of this experimental series is to duplicate (?) the physical processes that were carried out by the Norse at Vinland. This puts our team in a bit of an awkward position. All the archaeological evidence suggests that although the Norse did smelt local bog iron ore into a small bloom, they certainly did not 'do it very well'. We know from our own experience that merely adding chopped straw to the clay mix would virtually eliminate the cracking problems. Our quandary : Do we do what our experiences have taught us - or do we 'screw up' like they did?

In truth, the iron smelt presentation at LAM on August 21 is really about demonstrating the *process* to the general public, not about the quality or size of the bloom produced at all.

But its hard to report poor results openly ...

PS - I expect to have my full report on this smelt, with images, posted up to the web site in a couple of days. Will send the link when I've got the materials available.

Sunday, June 20, 2010

Working Meteor Iron?


I received a request about a possible commission to forge some meteor iron into a blade. I took the trouble to expand to detail on the response, with the full intent of sharing my opinions with my larger block of readers.


Here’s some of the difficulty of the piece…rather finding someone willing to forge it. My client wishes to use meteorite iron he acquired from an impact site in the states. Additionally he has floated the idea of using some volcanic ash in the forging or differential hardening of the blade. The piece that he wants is a conceptual art piece as much as a collectable show piece. The underlying theme of the piece will be “extinction”. I’ve come across a few suppliers in which knife makers use to buy stock metal that do have pattern forged steel using meteor iron but finding a small forge willing to use the iron he has or having experience enough to do so has been a little difficult so far.

Calvin - BadAss Jewellery

Here's the background:

1) Meteor Iron

The stuff is notoriously difficult to work with.

Merely getting a piece of meteor is not exactly easy - or cheap. As metal, it is sold by the gram, like silver. I do have a small slab of very high quality meteor iron, in the form of a cut and polished slab of metal. I got it from a jewellery supplier (now lost) maybe 15 years back. The piece is about 4 x 6 cm, about 3 mm thick. At the time it cost me roughly $100 US. I have no real idea what complete meteors of suitable size might cost. I'd estimate you would require a piece of raw meteor something between a golf ball and a tennis ball in size.
Individual complete meteors vary *extremely* in quality. Most are not suitable for forging, the mere process of heating and plunging through the earth's atmosphere doing nasty things to both the quality of the alloy and also tending to fracture the structure.
The reason any smiths you have talked to have mentioned layered steel with meteor as a component is that the best way to successfully end up with a workable blade is to incorporate the meteor iron into a matrix with other iron alloys to help hold the meteor together.

Image - The slab of meteor iron from Africa (Keyna?) The source was a huge ancient strike, large enough to be mined as metal. The dark spots are inclusions, note the stress cracks at the upper right. The metal has been polished and lightly etched for use as a jewellery material.

Meteor iron is extremely high in nickel content. To the tune of 7 - 15 % Nickel. Modern stainless steels are in the range of 0.5 to maybe 2%. Nickel is extremely hard to forge - the metal resists forming, even at forging temperatures. So a pure meteor, assuming it was not full of cracks and flaws to begin with, would be much more difficult to forge out than even modern alloy steels.

A meteor is made up of nickel and iron. No carbon what so ever. Carbon is what makes a blade hard, which is what allows it to keep a sharp edge. Although the rigid nature of the high nickel content would help this some, again a pure meteor blade would just not hold an edge like a simple carbon steel would. So once again, bladesmiths who are concerned with the qualities of a working knife will incorporate high carbon steels into the matrix with the meteor iron to provide something like correct edge holding. The customer needs to decide if they are expecting a piece of jewellery - or a working tool.

Nickel has a real attraction for sulphur, especially at welding temperatures. Sulphur 'spoils' the weld, if not keeping it from correctly fusing, it can make the result brittle. And working with straight meteor is more likely to require continual welding steps to correct for the tendency to fracture. The rigid nature of the nickel also means that the metal needs to be forged into the higher temperature ranges (At the normal orange, this stuff is so stiff it hardly moves under the hammer). Ideally the working forge would be a high end propane forge to try to eliminate the sulphur. Working against this is how much easier it is to control the correct working atmosphere (oxygen balance) required for successful welding in a coal forge. Again, the simplest way to prevent these specific problems is cover the nickel alloy with slabs of mild steel, so layered steel again.

Compared to some of the other problems, handing the material may seem trivial. But the frustration of trying to work up something from an irregular 'rock' is not to be discounted. I would expect you would end up spending more time chasing the hot piece as its bounces off the anvil than actually hammering it (based on admittedly limited past experience).

2) Volcanic Ash

I am not sure that there would be any utility to be provided here.
Ash is used in the annealing phase. In short, the longer the blade takes to cool, the softer it becomes for shaping, and most importantly, the more internal stresses are released. So the ideal annealing material would be an extremely good insulator. Wood ash is the normal material of choice, sometimes people use vermiculite. I have never had a sample of 'volcanic ash' to examine. I expect the material, given its source, may in fact *not* be an ideal insulator.
For your customer, it might be possible to build a steel box, fill that with the volcanic ash, then heat the whole thing. Insert the hot blade blank, then bury the whole box into a fire, let the fire cool naturally. The bulk of the wood fire around the box would provide the technically required slow heating. This is a lot of extra trouble just for a 'concept'.

The most obvious application of volcanic materials might lay in the polishing steps. I believe both pumice stone and powdered ash are used as abrasives in the Japanese traditions. I don't work with those methods myself. They are hand methods and time intensive (read expensive labour).


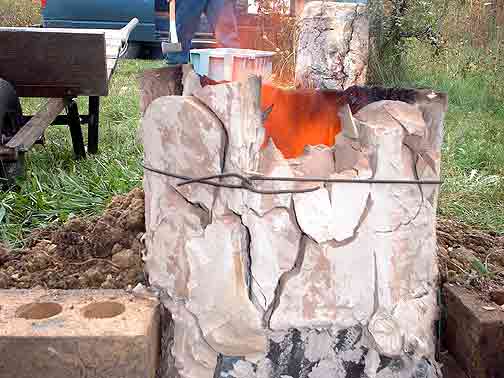
The various initial forging and manipulation problems are similar to those I experience when working iron blooms down into working bars. Although I certainly would not say I have the best experience with this (Lee Sauder is certainly the master there). I certainly have more than almost any Canadian blacksmith. (This not so much because I am so wonderfully skilled - more like no one else is that crazy.)

I have twice attempted to work up complete small nickel iron meteors into finished bars. In both cases, the material was provided by the client, pieces roughly the size of a half walnut (and about the same shape). Extremely difficult to manipulate something that small! Both times, the material completely disintegrated due to stress cracks and inclusions. The first time, I just gave up on the process the fragmentation was so bad. The second time I did what most everyone else does, which is layer the meteor material between pieces of modern steel. I was then able to create a billet of material with the meteor as one of several layers and finish the project.

The overall problem with the scope of the project is that there are just too many variables on the materials end to be able to quote a simple price. The whole forging process itself would be one giant experiment. This leaves you with two possibilities:
1) You find someone who has already developed working experience specifically with forging blades from solid meteor iron. The cost of a commission is going to reflect all the past effort to develop those skills.
2) You fund the experiment. This may mean covering the cost of several attempts before a product of the desired quality is the result

I would expect the raw materials to run several hundred dollars.
I would estimate the time expended would run at least a full working week. Ball park for that block of *my* time is $1000.

There are good technical reasons why most experienced bladesmiths are only offering meteor iron incorporated into layered steel billets - rather than pure meteor iron blades.

Monday, June 14, 2010

Poles for A frame Tents

My concern with wood top poles is they tend to snap under high winds and heavy rain ... So I am unsure if this is due to the wood typically used or that wood poles just tend to break.
(From NORSEFOLK - Writer deliberately obscured!)

The error almost all modern day re-enactors make is to fall prey to mere ease over following the example of the Norse and selecting the correct materials for tent frame construction.

The ideal material for any ridge pole for a tent is in fact a pole. A complete sapling.
I have a smaller (admittedly) 10 x 10 frame on my tent. It uses a selected spruce sapling for the top ridge pole. This tent has been up in heavy weather any number of times over its roughly 18 year life. This includes a gale force storm out at L'Anse aux Meadows itself.


The sapling started about twenty feet long, about four inches at the base. It was cut green, de-barked and then trimmed to the finished roughly 11 1/2 feet. The thick end is about 3 1/2 inches, the small end about 1 1/2. To get one both naturally dead straight, plus without a lot of side branches to trim, I found a cluster of about 8 or 10 saplings that were growing in a tight cluster together (My guess all the product of the same pine cone. I also let the prepared timber season a full year before I used it, standing upright.

The grain on a complete sapling is naturally evolved to resist sideways force.
Modern dimensional lumber is simply NOT. Cut from ever smaller and faster growing 'junk' timber, the quality of purchased lumber has declined rapidly in North America over the last two decades. (Yes, even here in Canada where most of the USA available lumber grows in the first place.) Grain is wide (weak, less resistant to warping). As saw cut lumber, the grain is cut across , producing diagonal lines of weakness. This leads to both warping and great possibility of breakage under any kind of sideways forces.

In the Viking Age, these same tent beams would have been cut from slow growing northern trees. So very dense grains, producing great strength. This tells you right off the start you should be selecting from even lumber with the tightest grain available - the heaviest pieces.
All Viking Age lumber would have been split - not saw cut. So all lumber would run with the grain, not across it. These straight grain lines produces lumber with great flexibility to forces sideways down the length. A Viking Age tent beam might sag - but it would not break.
The shapes of the three side beam sets on the Oseburg tent frames suggests all were likely cut from saplings, then these trimmed slightly to flatten two sides (with an adze or draw knife).

The best solution to the problem of combining strength with weight on the top ridge pole for a replica VA tent is simply to do exactly what they did - one single length from a complete sapling. Any attempt to use store bought modern (pathetic quality) dimensional lumber will just not give the performance required.

As so many reading are urban dwellers, my best suggestion is for you to make friends with someone who lives in the country. You should be able to arrange to get that single top ridge pole cut and delivered at your next camping event?


I later had this comment sent to me, which I have asked permission to pass along here:

They mostly sleep in tents that would have made a Jarl proud! Giant A-frame tents seem to be the norm these days. In-period, MOST of a ship's crew would have been sleeping cheek-to-jowl inside one of these.
I totally agree with you that modern dimensional lumber is going to pot. As a budding timbersmith, I'm learning to spot the good from the bad -- and a great deal is bad these days. For those who are loath to chop down their own trees, find a friendly local sawyer (many mill lumber part-time using portable equipment) and get him to QUARTER-SAW lumber for you. You'll pay a premium for this as it wastes some of the log, but without a retail operation to support, the local fellow might have reasonable prices overall. Quarter- and rift-sawn wood doesn't cut across the grain, mostly, and is less likely to warp. For a few dollars more, many will even cut your wood to length, plane it, etc. Worth asking about if you don't have a shop.

http://www.wisegeek.com/what-is-quartersawn-wood.htm

I'm fortunate to have a friendly sawmill close by that carries the good stuff in their little showroom at fair prices. Using local second-growth oaks (which is about the only thing they quarter-saw for retail), typical board width is a mere 6-8", roughly 1.25" thick. Can't beat the grain pattern though -- the top of my tool chest is quarter-sawn oak:

Michael / Einar - Michigan

Víkingarnir úr Mikillvötnumum


Thursday, June 10, 2010

Vinland at Wareham

What you will find at the DARC Viking Age presentation - Saturday June 12 (10a-4p):


This drawing roughly to scale 1/4" : 5'
light green - cut pathways
mid green - long grass
dark green - trees
white - fixed structures
pink - presentation areas

The physical layout being used is an attempt to duplicate the kinds of spaces that will be available to us at L'Anse aux Meadows NHSC. The large 'ship shelter' overhead (#5) takes the place of the main turf hall at LAM. Our 'cooking shelter' (#2) takes the place of the small dwelling hut. Our 'smelter shelter (#6) is the same size as the furnace hut.

Visitors are asked to abide by the following:

1) PARKING - Safest is along the N-S roadway (Sideroad 40) to the EAST of the grounds (right hand on drawing). Please leave the entrance drive clear.

2) WASHROOMS - There is a pit outhouse at the rear of the grounds. A port'a'john will be placed at the entry (# 7).

3) It is suggested you stay to the cut pathways. Remember this is a rural location (think of a hacked back field, not a suburban grass yard). Bare feet is a bad idea.

4) The pond is NOT FENCED - APPROACH AT YOUR OWN RISK. The banks on the north and east sides are steep and drop off to deep water.

5) DOGS ON LEASHES ONLY. There are three cats in the household. Their demands take precedence over any visiting animals!

6) Please, no historic costume for visitors.

7) There is NO PUBLIC ACCESS TO HOUSE OR WORKSHOP

ANY VISITORS ATTEND THIS EVENT AT THEIR OWN RISK


Please consider supporting the ongoing research and educational efforts of DARC by either making a donation, or purchasing one of the training DVDs / research CD-ROMs or Viking Game.

Tuesday, June 08, 2010

Kats...

A contribution from Vandy:

By Jim Wright : A Conversation with my Cat

Wherein the reader will learn that obviously Jim shares many aspects with your humble writer, including time in the military, a home workshop, life of an artist, rural life - and cats.


(yes - that is to a FISH!)

Horse shit - not Bull shit?

Recently the topic of iron smelting furnace construction has been discussed on Early Iron. Skip Williams mentioned the use of animal manure in clay mixtures for building walls. The question was asked :
Why use manure?

Short answer:
Structural strength and venting steam

If you consider the mechanics of the furnace, some light is shed here.
Provided you are pushing high air volumes* the furnace has a very high energy output.

One construction style is to have a relatively thin furnace wall, and so radiate enough heat off the *outside* that the wall material does not overheat and slump or melt. Sauder & Williams' 'Flue Tyle' furnace works on that principle.


The alternative is a relatively massive furnace wall, which endures through shear thickness. DARC's Econo Norse furnace is based on this principle. Wall materials will erode, but there is enough thickness to prevent burn through on a single firing. The walls would be patched between uses. This is the historical method - pretty much across all cultures and times.

Now, balance that against the physical dynamics of clay into ceramics.
If a piece of clay is any thicker than about 3 - 4 cm, the process of heating through to extremely high temperatures causes a lot of problems. First problem is any remaining water in the matrix flash heating to steam, with incredible expansion. This causes cracking at the very least, even explosive spalling (!) at the very worst.
This is even more difficult if you are heating it from one side only (like in a furnace wall). Even if absolutely bone dry, the difference in expansion alone between the inner, hot side and the outer, relatively cold, side will result in cracking.
Careful pre-heating of the furnace can certainly limit these effects. Historically furnaces where built either extremely massive, or set into earthen banks. In either case, this allows the structure to remain supported even if the walls are cracked. Earth banked furnaces also keep any cracks from venting those important working gases from the furnace.

A partial solution to the steam venting and resulting cracking is to provide some extra internal support and a venting method within the furnace wall itself. So what we are talking about here is the addition of some organic materials into the clay mixure to create a 'cobb'.
Straw is the ideal natural material for this. Our experience has shown that copping dry straw down to roughly 5 - 10 cm lengths gives the best effect. The short lengths provide a number of desirable effects:
- The individual pieces act as reinforcing bars inside the clay. Any cracks which might develop are this prevented from splitting open.
- The straw is hollow, and so acts both to absorb and vent out steam as it develops.
- As the thick furnace wall heats over the smelt, the inner layers will get hot enough to sinter to ceramic. The straw inside the inner wall will actually burn away, resulting in a somewhat insulating zone. The outer most portions of the walls never get hot enough (over most of the furnace) to carbonize the straw. So the outer layers still retain the re-enforcing quality.

A free standing furnace, with clay / straw cobb walls, is quite durable. Protected from moisture (limiting the freeze thaw cycle) it will easily require only minimal repairs even if several years old.

So - the point of the manure?
You need to use *specific* manure! Thats horse manure. Horses are not as efficient in grinding and digesting grasses, so horse manure is composed of a lot of small pieces of material, maybe 1 cm or so in length. The resulting cobb has a very fine texture, which is certainly easier to manipulate during furnace construction than the use of chopped straw. Personally, I find manure mix has less structural strength. (However I freely admit that I have not built an entire furnace from this material.)

You want to use *old dry manure*. The 'balls' are easy to shred up by just rubbing them between your hands. Fresh manure is more difficult to break up and mix with the clay. There is also a bigger variation in moisture content that can be a bit of a problem.

You should take a look at the work of Micheal Nissen from the Ribe Viking Centre in Denmark. He uses the 'bellows plate and blow tube' system. He works with a mix of roughly 50 / 50 clay and horse manure (volume) to construct the thin plate that sits around the tuyere area of the furnace.


* See Lee and Skip's basic research on this. The working number is 1.2 - 1.5 litres per minute, for each cm2 of cross section at tuyere level. This can be produced with hand powered bellows, either a 'traditional' N European 'great bellows', or a larger than normal Norse style double bellows. Certainly no problem with electric blowers.

Tuesday, June 01, 2010

'Trees' Panel Completed

This is a status update on the real work I have been doing. (As in paid work!).

I had commented earlier here ('Trees' for Reade & Maxwell Residence) on the problem I was having coming up with a solid design for the 'last' elements in this larger project.

The work turned out to be more tedious than expected. The individual uprights were forged from 1/2 round solid, and '3/4' / ' 1 1/4' / '2' inch schedule 40 pipe. (Those are the rough *exterior* diameters chosen, schedule 40 is in fact measured by the *internal* diameter.) The pipe sections were slightly flattened to distort them to a more organic looking profile. The tedious part was welding and grinding the smooth joints for the various 'branches'.

The image below corresponds to the layout image. This is really the 'back' of the piece - the side that will be visible looking up towards the landing from the great room when installed.


Below is the view of the 'front' - the side that will be closely viewed from the landing. So this is the side you would have your hands on when you stand on the landing.


A couple of things may strike you right at the first view:
• The top hand rail is not flat. It arcs up from a low point of about 38 above deck level to about 44 above at its highest.
• The panel itself is not flat, with individual elements woven back and forth to create a more 3-D effect.

The tall 'cut' branch to the left has been left intentionally open. My idea there is that this provides a place to hide rolled up paper (birch bark?) for 'secret messages'.

The next stage in the project is to create the matching diagonal panel, which runs from the landing up the stairs to the second floor...

(These images have been slightly worked in photoshop to remove the pipe bracing I used to support the panel for the photograph.)
 

February 15 - May 15, 2012 : Supported by a Crafts Projects - Creation and Development Grant

COPYRIGHT NOTICE - All posted text and images @ Darrell Markewitz.
No duplication, in whole or in part, is permitted without the author's expressed written permission.
For a detailed copyright statement : go HERE