Monday, September 22, 2008

Ore Sources?

...I am currently a student ... and am taking an experimental archeaology class where we intend to attempt a smelt similar to yours. ... I am however, having trouble finding an ore source for our experiment. Can you suggest any suppliers?


You are stuck on the basic problem that all of us working with experimental iron smelting have - where do we get some ore? Although iron is one of the most common elements on the earth's surface, a good workable iron ore body can be hard to find. This problem also defined historic iron smelting sites, which are almost always situated at the location of the ore.
The physical dynamics of the kind of small scale direct iron bloomeries that are seen in Early Medieval archaeology require an iron ore body with an iron oxide (Fe2O3) content of at least 60 %, or about 40 - 45 % Fe. Any lower than that, and the likelihood of producing a viable bloom quickly drops to zero. (This problem of acquiring rich enough ore is what I observed as the major difficulty experienced by the Danish teams.) This is compounded by the fact that modern commercially mined ores are often closer to 30 % iron content (and thus not workable in this type of furnace.)

The underlaying geography of your region will be key to your ability to find a usable deposit of workable iron ore. Even though the total volumes are small (in the range of 50 - 100 lbs ore per smelt) sometimes getting access can become a problem.

Some useful (?) suggestions:

1) First, try to determine if natural deposits of primary bog iron ore are found in your region. The chemistry and geography (even climate) of your area will suggest if this is even possible. Then there is a lot of hunting to undertake to find a useful deposit. I know from my own poking around in northern Newfoundland (were the conditions for formation are ideal) that finding a working volume of bog ore is almost as much by chance as by intent. One problem here is that modern land clearing and draining most commonly destroy the natural process of bog ore deposit.

2) Sauder and Williams looked at old Colonial era records to find abandoned mines to explore. Since the smelting technologies of Revolutionary period were quite similar to those under consideration, the ore bodies exploited are often of a useful concentration. Old county records of industrial history or mining claims may help here. Of course there is a good chance that these mines were completely cleaned out. Hopefully enough material would remain to supply a couple of experimental smelts. There is a vein of ancient geothite iron ore that runs under most (if not all) the Blue Ridge. Sauder and Williams tap into this seam as their (quite excellent) ore source. The group working out of Colonial Williamsburg have local deposits eroded from this parent body available in their area. I can't comment on how far south this material may be found (remember I'm located in Ontario!)

3) There are a couple of modern substitutes. Again availability and ease of access may vary:

A) Industrial Taconite - These are the pellets prepared at modern mine sites from rock ore deposits. At the mine, the rock is crushed and the iron oxide concentrated to marble sized pieces for shipping (via rail or boat) to steel mills. Often at all the points along the distribution chain there is considerable spillage. Enough ore for a smelt can be sometimes gathered off the ground along rail lines. Obviously you need to be located near a mine, mill or transit lane for this source to be useful. One of the advantages of taconite is that it is very easy to handle, and both roasts and breaks up fairly easily. The chemical content is often known to close detail.

B) Industrial Hematite - This material is used for commercial sand blasting, and is available as a fine grit. Check your local 'Industrial Sand Blasting' company in the yellow pages. The material is distributed (source is Quebec Canada) by Opta Minerals / Virginia Minerals This is an extremely pure and concentrated iron oxide. It does have too fine a particle size, which means some careful control of the smelt process is required. It is also quite inexpensive, at about $20 for a 90 lb bag.

C) Red Iron Oxide / DARC Dirt 1 - Red iron oxide is used for colour in paints, concrete and most importantly by potters. Your best source for this may be your local ceramic supplier. Bags of 'Spanish Red' are again quite inexpensive (also about $20 per 90 lb bag). The material as purchased is too fine to work correctly inside the type of smelter under discussion however.
The solution we have been developing (DARC) is to mix up the powder with an organic binder (flour) and some additional silica (fine white sand). Water is added to create a paste, which is then spread and left to sun dry, then broken up to the desired particle size.
If you piece together the past postings related to DARC Dirt on the blog, you would get a running commentary of our (yet unpublished) work on this analog for primary bog iron ore. (I would ask anyone making use of our data to credit this base level research.)


There is a lot of related information buried inside the various blog entries and through the various articles and reports on the web site. Each ore body has its own quirks, even historically, furnaces were altered off the basic plan to suit the dynamics of a particular ore.

Sunday, September 21, 2008

Forged from Blooms - 'Offering Bowl'

I will be demonstrating iron smelting at the upcoming 'Quad State Roundup' a regional blacksmith's conference held by SOFA at Troy Ohio, Sept. 26 - 28. I will be commenting on a number of pieces I will be creating this week to display in the gallery there.
Offering Bowl


This object for sale - $400


'Offering Bowl' is forged from part of the 'Resurection' Bloom made at in 2005.
Influenced by the sculptural work of Lee Sauder, I envisioned creating a bowl like form that was sold in the centre and preserved the ragged edges of the natural bloom along the margins. A first attempt was made at this piece earlier in the year, but the bloom material was not consolidated enough and the resulting form broke into several large pieces.

The work started with a pile of three fragments of partially (poorly!) consolidated iron from the original bloom. At this point the original bloom had been subjected to a single weld series. The places were flattened, then welded to a piece of mild steel for a handle. This starting stack was roughly four inches long by 2 1/2 wide and about one inch thick.

The stack was brought to a welding heat and give an initial quick working with a hand hammer. The edges were re-fluxed, and it was returned to the fire for another weld heat. This time the flat surfaces were compressed under my small air hammer.
The sequence was repeated a second time. On this second weld course, some working of the two long dimension edges was undertaken as well. The two ends were not compressed.

Now that the bloom iron had been pretty much welded to a solid billet, the material was compressed to create a flat plate. This work was done with a heavy crowned hammer and under both flat and crown dies on the air hammer. The end result was a thin plate, roughly 8 inches long by about 4 wide and roughly 1/8 thick. There was some splintering and cracking in the centre of the plate, but this was specifically retained.

The last step was to roughly smooth one surface on the course belt sander. This would form the inner surface of the finished piece. The plate was again heated, then worked with ball peens into a deep dishing form. This created the finial partial sphere shape.

This shows the finished 'Offering Bowl' in a crisper (flash) image.

Sunday, September 14, 2008

Insurance, Authorities and the Home Forge

The question: Darrell, did setting up your forge affect your house insurance?

Did you have any problems with your insurance and if so, how did you fix them?

I want to set up my drive-shed as a forge, but for the last few days I’ve been worrying about my house insurance and whether that will prevent me for doing what I want.


DON'T ASK - DON'T TELL

Not in your wildest dreams should you consider telling your insurance company - or any one else remotely official - about your forge. Even if you are professional, (like I am), do NOT tell any authorities what you are doing!

Forge work is normally grouped in with foundry work in the minds of 'the authorities' - which means a HEAVY INDUSTRIAL classification. The ramifications of this are immense - and fatal to your operation. How is your property actually zoned?

Concider the requirement on environmental equipment if those clowns get wind.
There was a situation a couple of years back with a teenager who had taken a couple of courses with me, and showed considerable promise as a young smith. He had applied and received one of those Ontario 'teen small business start up' grants. This comes with an advisor to administrate the funding and process. That person, acting in good faith (but some lack of insight), had suggested that the Ministry of Environment be contacted about the operation. The result was a requirement for a full scale Environmental Impact Assessment - a process identical to the one major industrial concerns (steel mills like Stelco or Defasco) have to undertake. A rough price tag of $5000. Needless to say, it killed this 16 year olds plans to make candle holders in his back yard!

Now one thing you MIGHT try - is the dodge I am now personally using here. In recent conversations with my own insurance company (about coverage for computers), I have gotten a special addition to my home owners as a 'Home based business' , defined as a 'self employed artist'. This costs me $140 per year on my main policy. It covers me for $25 K on tools, gives me an extra $2 M liability, coverage for stock at shows.

What a couple of friends of mine who work in the insurance business have repeatedly told me is : ACCEPT THE RISK.
In short, if you end up burning down the forge building, just take the loss and pay for the damage.
The forge is actually pretty darn safe. You basicaly NEVER leave the fire when its running - and its only when the forge is lit that there is any possible fire damage anyway. The whole set up is designed to safely contain the fire in the first place. Here at Wareham, the cutting torches and the propane space heater are a LOT more risky than the actual forge itself is.

My serious advice is to consider the set up of your equipment, and when in doubt stick extra brick or sheet steel around areas that may be possible fire points.

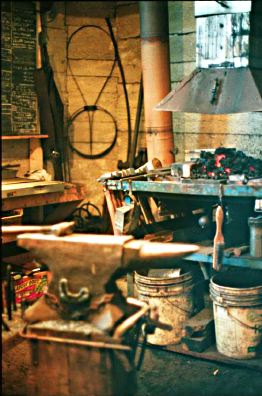
An (older) image of the working forge here in Wareham.

The floor under the forge itself is made of concrete paving slab and brick on dirt. The rear exterior wall is concrete. I have put up studs and insulation on this surface, but used sheet steel to cover the walls around the forge.

Regular Readers : You may have noticed that the past month has contained a slide towards fine arts away from the more usual technical subjects. This is a reflection of my own August art show involvement. I'm back into the forge now, and we return you to your regularly scheduled programing...

Saturday, September 13, 2008

21st Cee - Clootie Tree


" Clootie wells... are places of pilgrimage in Celtic areas. They are wells or springs, almost always with a tree growing beside them, where strips of cloth or rags have been left, usually tied to the branches off the tree as part of a healing ritual.
When used at the clootie wells in Scotland and Ireland the pieces of cloth are generally dipped in the water of the holy well and then tied to a branch while a prayer of supplication is said to the spirit of the well - in modern times usually a saint, but in pre-Christian times a goddess or local nature spirit. This is most often done by those seeking healing, though some may do it simply to honour the spirit of the well. In either case, many see this as a probable continuation of the ancient Celtic practice of leaving votive offerings in wells or pits. "
(from Wikipedia)

So what form would a Clootie Tree take into the twenty first Century?


In a modern era when so few of us (in North America at least) actually write by hand any more, what form would our petitions to 'the Powers' actually take? One of the impacts of computers on writing has been the quite noticeable effect of the lengthening of any message. The inclusion of more and more raw information, often presented quite poorly. Massive volume over clear content. We save on hard drives or CD-ROM disks, we are driven to fill the vast spaces with something.

How will the ancient spirits react to our compulsion to employ the latest technological gadget? Our quickly eroding abilities with even the most basic of traditional skills? At root, our disassociation with the natural world itself?

21st Cee - Clootie Tree was installed just across from the entrance to the Celtic Festival park site in Goderich the week of August 4 - 11, 2008.

Sunday, September 07, 2008

GRAVE GOODS

Those of you following here would have seen an number of entries related to GRAVE GOODS:

September 5 - November 1

the Woodstock Museum

466 Dundas St - Woodstock ON


This is a general panoramic view from the rear of the hall.
The Grave Goods web site is HERE
For directions to the Woodstock Museum, go on to that web site HERE

Wednesday, September 03, 2008

Glass Bead Making at Bonfield

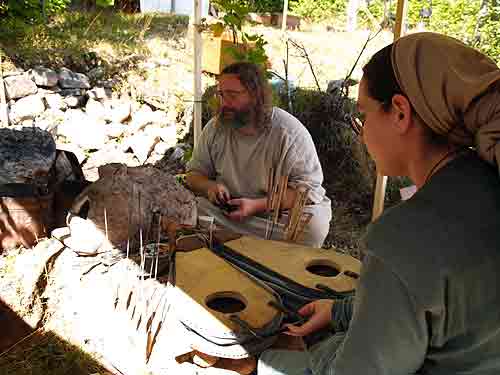
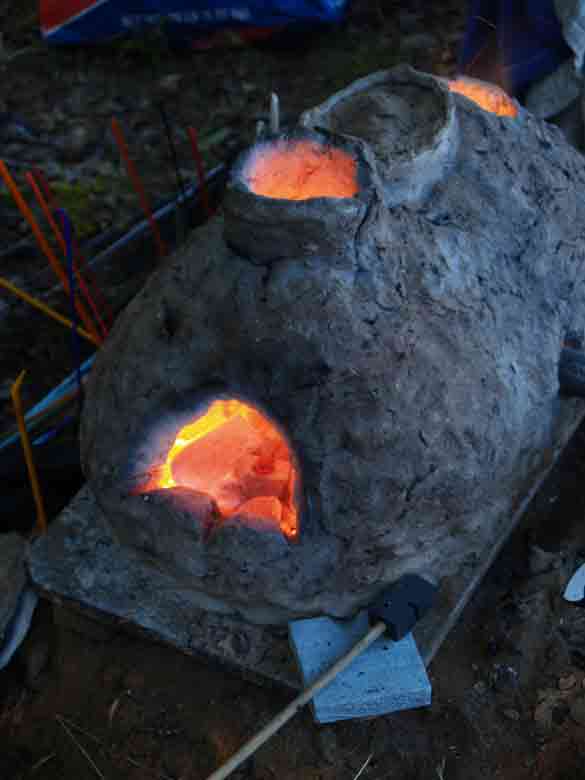
Over the weekend at 'Barron's Howe' (Bonfield ON) Neil Peterson hauled up his current version of a glass bead making furnace. Two afternoons were spent with demonstration and teaching, plus further experimentation with this prototype. As with the iron furnaces, there is only minimal archaeology to suggest the actual design of Viking Age glass working furnaces. The physical techniques that may have been used are also unknown. An overview of the furnace in operation. Meghan operates the double bag bellows, with Neil at one of the two working ports set to either end of the furnace.

Neil has been basing his reconstruction on the size of the furnace base as has been found at the excavations at Ribe, Denmark. Right now we have configured the furnace superstructure with the air blast in the middle on one side. On this mark 3 furnace, there is a triangular diverter opposite the tuyere to sweep the air blast towards the two working ports set on either end of the long axis. Each of the work stations have different layouts, in terms of the side port and upper exhaust hole shape and size.

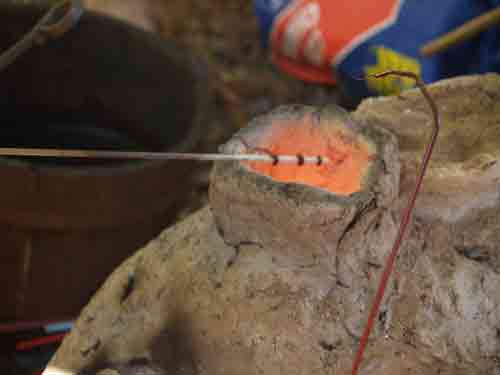
Showing the use of glass rods heated and worked inside the exhaust hole.

When using a modern styled glass rod as the raw material, it is possible to use the hot exhaust gases much like working with a torch would be in standard lampwork technique. The current layout of the exhaust holes is not ideal for this method. Although generally much easier (especially for first time users) there are few actual remains of glass rods found to suggest this method.

Showing work inside the furnace through one of the end ports. Note the small chip of flat glass heating on a piece of charcoal.

The raw material used most often (judged by artifact remains) in the Viking Age were 'tesseri' - fragments of flat glass originally prepared for mosaic work. Our experiments continue to figure out the best way to physically manipulate the often irregular pieces (roughly 1 - 2 cm on a side) to achieve a symmetrical bead.

Readers who wish to follow this series of experiments should take a look at the following articles / postings:
Dark Ages Recreation Company BLOG

Neil Peterson's work on illustrating Viking Age Beads

A look at the current work at the Ribe Viking Centre