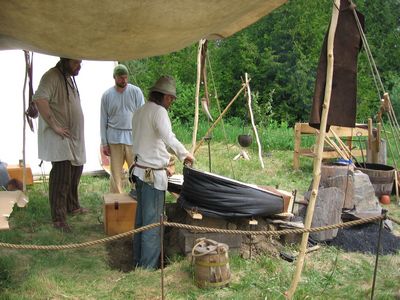
Wednesday, October 28, 2020

65 at 65

An iron smelt event

October 31

Wareham

I have been casting around for some direction to head with the long set of individual iron smelting experiments, now after the better part of 20 years of undertaking.

Start of the insanity : L'Anse aux Meadows - Summer, 2001

 Starting with that initial week long research workshop at L'Anse aux Meadows NHSC for Parks Canada, the first years were spent just figuring out how to even get any iron at all (!) I dragged members of the Dark Ages Re-Creation Company into the madness. It would not be until my 6th attempt (# 4 with DARC) in Fall of 2004, that there would actually be a workable iron bloom produced.

I was lucky to fall in with Lee Sauder & Skip Williams, and Mike McCarthy. Mike would boldly start the original 'Early Iron' symposium series, the four of us forming the 'Gangue aux Fer'

Sauder / Williams / McCarthy (me in the back) - Early Iron 1, 2004

Lee would launch an annual series of workshops at his home base in Lexington, Virginia, running 10 - 14 days every March from 2005 through to 2011. At 'Smeltfest', furnaces were built and fired daily, investigating the individual variables which effected the success (or failure!) of bloomery iron production in small scale furnaces. Over those years there would be a number of additions, with Shelton Brower and Steve Mankowski (of Colonial Williamsburg) becoming other core members. Another significant accomplishment would be the development of the 'Aristotle' re-melting furnace, which we tested extensively in 2009.

Brower / Sauder / DIck Sargent / Williams / Mankowski - Smeltfest 2009

Here at Wareham, the experience and knowledge gained from all this trial and error experimentation would start to be applied 'backwards' towards specific historic historical prototypes, potential equipment, and possible methods - most specifically to those from Northern European / Viking Age archaeology.

The first specific archaeological series was with Kevin Smith, based on his excavations at Hals in Iceland, with experimental work starting in October of 2007. A total of 8 full smelts were undertaken in this series, extending through to October 2016. 

Neil Peterson, Icelandic grass sod furnace - Hals #8, 2016

Part of the reason that the Hals series ran so long is that the DARC team was approached by Parks Canada in 2009 about running a full scale re-creation of the iron smelt by the Norse at Vinland, as a public demonstration event in 2010. A total of five experimental smelts were ran in this initial series, to be followed up later by another demonstration event in 2017. Both these smelts at L'Anse aux Meadows NHSC would use all circa 1000 type equipment, other than required safety equipment.

Mark Pilgrim (LAM) / Dave Cox (DARC) / me, Vinland #5 (at L'Anse aux Meadows), 2010
Other experimental series work has included two projects from early Scotland :

- Turf To Tools at the Scottish Sculpture Workshop (Lumsden, Aberdeenshire). This based on their local Pictish history (so post Roman / pre Viking). This included one test smelt here in Canada, then four at SSW, in 2014. The second segment of the project was in 2016 and was composed of another three smelts in Scotland. There was a third segment planned to complete this overall combination research and artistic project for September 2020, but COVID lead to postponement. 

- Work at the Scottish Crannogg Centre, based on Early Celtic Iron Age. This series has included one test at Wareham, staff training on site in Aberfeldy in 2016, then a demonstration smelt in 2017. 

Uist Corrigan / Eden Jolly (SSW), T2TA, 2016

Along the way :

- The development of an primary bog iron ore analog, based on the physical characteristics of the natural material found in excavations at L'Anse aux Meadows.

- A number of full scale tests of various historic human powered air systems. (experimentation possibly remains here.)

In total, to date I have personally mounted  over 85 individual iron smelts.  The majority have been intended to answer specific experimental questions, or to accumulate enough working experience to allow useful data to be gathered. There have been a significant number undertaken as public demonstrations, at international symposiums, or as training sessions for students.


'What's next?'

When my long time collaborator and smelting partner Neil Peterson was up to Wareham last week (for a day rendering bloom pieces into useful working bars), he asked what the plan was. The last experimental smelt was the 'Bones' test in June. Although there could be a continuation there, truthfully I don't feel there is much insight to be gained that would be worth the investment in materials, time and effort. I had started some background on early Irish bowl furnaces, but not enough at this point to realistically frame a working experimental series based on this. 

We considered the current test furnace, the stone block, built for a second Icelandic research project over 2019. This furnace has been fired four times at this point, and had suffered some structural damage on its last use (course over Thanksgiving).  Given the shift to colder late fall temperatures (below freezing at night, mid single digits daytime) and the general lack of a clear direction, I decided to repair this furnace for one use.

Condition of the stone block after Oct 11 smelt. The red line is where the original lintel stone (above the extraction arch) had broken out.  

I turn 65 just days after the already scheduled Samhain Iron Smelt, set for Saturday 31 October. 

With tongue in cheek, Neil said " 65 in 65. You could smelt 65 kg of ore. "

Now, the largest volume smelts I personally have ever done have been with 45 kg of ore ( Smeltfest 2005). These also resulted in some of the largest blooms, into the range of plus 20 kg. Attempting 65 kg could increase everything by 40 %, importantly the amount of charcoal and raw working time ( * ). Bloom yield also increases steeply with larger ore amounts. I'm not really sure the furnace on hand would contain what likely would be such a massive bloom!

Past use of this specific furnace has shown it will accept alternating 2 and 3 kg charges at the end (this against standard 1.8 kg charcoal amounts, burn rate averaging 14 minutes.) The stone mass has been found to take significantly longer to come up to working temperature (in the past about 2 + hours). With our normal roughly 30 kg ore amounts, the elapsed time of the main sequence has been in the range of 5 hours.That all suggests an attempt at a 65 kg smelt would add about another 3 - 3 1/2 hours to the main smelt sequence, suggesting a total experimental time (first pre-heat to final extraction) of 12 1/2 hours. ( ** ) 


Just recently, the metal bands on my cut wooden barrel slack tub failed. One of the 'mystic' things here is that tub has never been emptied since I set up the forge at Wareham, back in 1990. (This included some water gathered from the point where Black Duck Brook mixes with the ocean, just downstream from the Smelter Hut at L'Anse aux Meadows.) In the process of replacing the bands, 30 years of accumulated iron forge scale was collected. This material, 2.5 kg, had been added to the analog mix being made in preparation for Saturday's smelt. This material is still drying, but there should be at least 30 - 32 kg of analog.

As I have mentioned before, the region around Wareham does not contain any naturally occurring iron ore. This has meant over the years having to use a wide range of types (and quality!) of ores, perhaps more than any other long working team :

- primary bog iron ore - Newfoundland / Denmark

- 'Lexington Brown' limonite - Virginia

- industrial taconite - Ontario / Scotland

- hematite grit - Quebec

- red iron oxide as analog

- black iron oxide as analog

It has occurred to me that I do have plenty of the other ore types we have worked with here over past experiments. Right now I have a good large amount of variable quality Lexington limonite, including a 'smelt's worth' already roasted an partially broken for size. There is also about 40 kg of hematite grit remaining. 

This suggests starting with 6.5 kg of the limonite (pretty much were we started, and a tribute to Lee and Skip), followed by 6.5 kg of the hematite (which actually was the next ore body which we worked with, easily available in Ontario back at that point). The limonite, which I gathered, does tend to be on the lower iron content side. This should be balanced with the hematite, which if anything tends to be too rich (lacking in silica for slag formation). The balance will be the current analog mix.


This is an 'open invitational' event - with limits imposed by COVID.

What that means is that interested individuals may attend, but do need to contact me directly before attending, ideally by e-mail

Core working team is likely to be gathered from those with past experience. Although observers are welcome, this is not a 'teaching' styled event. (Ok - we all know it is hard to shut me up!)

- Masking will be required

- Distancing will be in effect

- Visitors will have no access to the residence. 


( * ) This not strictly true. At the later end of a smelt sequence, charges are typically large, 1 : 1 with charcoal, or even more. 

( ** ) The limiting factor may turn out to be charcoal. Between what I have on hand here, and what Neil has in store, the total looks to be 12 bags / 100 kg. A normal 30 kg smelt typically consumes about 60 kg. Hopefully this will be 'just enough'.

One problem right now is that with COVID, the normally used 'Maple Leaf' brand via Home Hardware is completely out of stock - and back ordered to at least Spring 2021. Recently Canadian Tire was able to secure a bulk order of Royal Oak out of the USA. Neil grabbed a large quantity, but stores quickly ran through that stock.

Friday, October 23, 2020

Rendering some Blooms


My smelting partner Neil Peterson was up again yesterday for another session forging bloom pieces down to working bars. For Neil this is skills development, for me it is nudging me into the forge.

Although hardly conclusive, I thought I would pull together some (very!) rough numbers on ore / bloom / bar. The purpose of these working sessions has been primarily to bring Neil's skill at forge welding and working with bloomery iron (and to further refine my own skills!). For that reason, we have been going through the considerable pile of mainly DARC experimental results. We have been selecting smaller, roughly fist sized fragments or sections, largely because these best fit into on hand forges for effective heating, and also under the dies of the two major power tools available here. Starting with pieces in the 500 gm range also leads to fairly effective hand hammering. (It should be also noted that all the forge work was via a modern coal forge!)

As it turns out, the two bloom pieces chosen are actually from one of the very first, and one of the very last, smelting efforts here.

One element that needs to be considered is that quite intentionally, almost all the smelts we undertake are deliberately on the smaller ore mass side. Our standard is using 25 - 30 kg of ore. As primarily our purpose is to test various variables related first functional furnaces, and later to specific historic prototypes, this has proven a large enough ore amount to certainly generate a viable bloom. These amounts have also tended to result in total bloom sizes in the 3 - 5 kg range. When quartered, you can see this means individual segments (depending on consistency) in the 700 - 1200 gm range - smaller pieces more easily rendered to bar by a single worker. 

As anyone who has made their own bloomery iron knows, it takes a certain addition of ore to 'prime' the system, in my experience typically about 8 kg to create a working slag bowl (1)


The piece Neil chose was a segment of the June 2020 'Bones' experiment. Of itself, this was not aimed at iron production, but actually testing the survival of bone as added at differing spots in the overall smelting sequence. In terms of iron production, this smelt was a disappointment, a low yield and resulting in a very crumbly textured bloom.

Bloom Pieces (6/20) Neil had chosen the bottom centre piece

This was the second working session for Neil using this bloom piece, which started as 407 gms. On his first session, he had collapsed what is obviously a quite fragmented and 'slaggy' piece into a rough 'brick'. This still had major flaws (cracks), especially to the two ends. Neil worked the small piece holding with tongs. A high number of welding steps were undertaken, certainly more than ideal. However Neil was quite new to forge welding as a process (and overall blacksmithing as a skill set). At that stage, the piece had been reduced to 240 gm.

Working Sequence - image by Neil Peterson

Working Thursday (Oct 23) Neil continued, first compressing and welding up the end flaws, then flattening to a 'book' shape. He then scored and folded, rewelding the two half sections (again all using tongs). This 'brick' shape was then drawn out under the air hammer into the bar seen above. Total 183 gm at roughly 3/4 x 5 1/4 x 1/4 inches. Spark test suggested the result was in the range of a mid carbon content (in the range of 50 points - 1/2%) (2)


I had chosen a grouping of small fragments which had previously been slightly compacted, and MIG welded on to mild steel flat bar handles. The selection was mainly because individually the pieces were roughly the same size, but individually really too small to expect much by way of useful size when compacted. As it turned out on examination, these pieces were all from our very first truly successful bloom creation, from Oct 2004. It should be noted that I did not have numbers on the weight of the starting bloom fragments leading to these pieces, which were at least partially compacted. ( 3 )

Bloom fragments : Oct 2004

I left the handle attached to the largest of these pieces, at 219 gm, then stacked the remaining two, at 95 and 165 gm, for a starting total of 480 gm. Although the starting shapes made for a poor fit, I lightly tack MIG welded the pieces together for ease of handling. 

starting fragments - before tack welding together

Honestly, I have hardly been in the forge at all since COVID lockdown started. So I was actually pretty surprised how easily these fragments worked up. Despite the considerable distance between the coal forge and the hydraulic press, I chanced making the first weld compression using the press. The result was a fully welded together flat plate, with the expected ragged edges. These actually welded in fairly nicely, with less lost fragments than I really expected. Early in this process the handy bar stick broke free, so the remainder of the work was done gripping with tongs. There was one large surface flaw that developed (largely the result of the layering of the central and smallest piece as seen above) It occurred that quick transfer on to the air hammer easily welded in this large diagonal crack. There was no second fold and weld (as Neil had done). The end result was a small bar at 391 gm, roughly 1 x 8 x 3/8 inches. This spark tested to a bit less carbon than the mild steel reference bar, so something about 15 points - 1/6 %

The two finished bars (Darrell top / Neil bottom)

As bloomery iron makers, we talk much about the ore to bloom phase yields. This is not really a fair comparison between individuals, or really between individual smelt events. Ore type, iron content will obviously have a major impact on even theoretical results.  Larger volume ore in a smelt seriously impacts expected yields, with minimum amounts needed to get anything, increasing amount also serving to increase not just bloom weight, but also per cent return. 

In this case, there are not good numbers for the initial ore to bloom phase :

Oct 2004 = (minimal) Notes indicate 2.0 kg bloom mass, but no record of the amount of 'Lexington Brown' limonite ore that was used. 

June 2020 = (better!) Notes indicate 2.6 bloom mass, from 24.75 DD2 analog. At 10% yield within a regularly used furnace build and proven method, clearly something else effected the result. The major difference was the addition of several KG of bone (some with meat attached) during the smelt.


Looking at just the starting bloom to working bar phase however, some allowance needs to be made for the skill of the individual workers :

Neil (novice) = 407 returns 183 gm @ 45 %

Darrell (experienced) = 480 returns 391@ 81 %

But honestly, the variable quality of the starting material is most certainly an important factor as well!


1) Certainly a variable dependent on the ore quality / content. (Since 2016) We have been using a method illustrated by Micheal Nissen of Denmark, where the first 3 - 5 kg charges are made of iron rich tap slag retained from an earlier smelt. This has proven to more quickly establish the working slag bowl, thus meaning the following additions of ore go straight into bloom creation. Overall this method will significantly improve overall yields.

2) It is important to note that this kind of 'Spark Test' is at best both relative, and based largely on personal experience. Known bars of known mild (20 point - 1/5%) / spring (45 point - 1/2%) / high carbon (95 point - 1%) are used for comparison. The bloomery bars are air annealed, with the central part of the bar used against the grinder. It is well understood that bloomery iron, by its very creation process, is quite inconsistent in carbon content (top to bottom / inside to outside of the same bloom can show quite different carbon contents. The number of welding heats taken during the bloom to bar operation can effect carbon content. The size of the starting piece, and the number of folds done in the bar creation, will also have an effect in the results.

3) This smelt was # 6 - so very early in our experience. Up to that point we had extremely poor results, we were still trying to figure out how to get much of anything to function correctly. Note taking had not evolved into any kind of standard. This smelt actually was undertaken almost on the spur of the moment (on a wet afternoon, beer was involved). It turned out to be the first attempt at what would develop into the 'Econo-Norse' test / teaching furnace design. Taken altogether, it is amazing we ended up with iron at all!

Saturday, October 10, 2020

"Can you sharpen.."

Yes

But I won't

I am looking to get an edge put on a hewing spearhead I had received as a gift. I just personally do not feel comfortable enough handling it myself as I do not believe I have the proper skill set.

Short answer is that I am extremely reluctant to take on a job like this one.

There are a couple of components to consider here.

1) An extremely important consideration :
The nature of the original work.
You said you had gotten the spear head as a gift. This likely means you don't have the best information on the original maker. This important related to the undertaking of sharpening (to some extent) but most importantly to the results of this work.
You can physically sharpen almost anything. Consider a paper cut!

Sharpening as a process involves some care and precision, and some combination of time and/or tools. Physically, you need to maintain a precise angle with the tools chosen, over the length of the metal, mirror imaged (usually) on the two sides. This is repeated with finer and finer abrasive surfaces. An edge made sharp using a bench grinder will certainly cut effectively. But the result is a ragged edge, which catches on the a material being cut and quickly degrades. By continued polishing of the edge with finer abrasives, the ragged will become smooth, so leaves less and less to catch and tear.

The hardness of the base material determines :
- how thin a physical edge which can be created
* most importantly *
- how durable that sharpened edge will be.

In use, that fine edge starts to wear away. The harder the material, the longer this takes.
The problem with an object from an unknown maker is two fold :

a) What *was* the original material used?

An extreme example : A high tin bronze alloy can be mixed to be harder than low carbon iron - you can cut wrought iron with certain bronze tools. (The main difference is that this high tin bronze is also a brittle as glass, low carbon iron is flexible and will bend rather than break - consider a sword in use?)
In iron alloys, the primary additional element is carbon. It does not take very much carbon to radically change the hardness of the metal. Significant is that hardness almost always increases brittleness. Antique wrought iron typically has next to no carbon at all (which is why antique objects are often so massive looking, more material was needed to give the required strength. Consider old barn hinges as a good example.)
The most common material in our modern world is mild steel. This material has roughly 0.20 % carbon. This is just enough (see below) to possibly be a 'bit hard'. It also remains soft enough to easily machine (or hand forge). Many 'reproduction' weapons are made of this material, simply as a cost factor.
At roughly 0.50% carbon you have a 'spring' steel. This provides a nice balance of potential hardness (so edge durability) against breaking. So again dependent on heat treating (below), this is a simple alloy choice for 'high impact' cutting edges (read : swords).
As you increase up to about 0.75% you get 'high carbon' steels. Good for fine edge but low impact tools - smaller knives intended for fine slicing (skinning knives).

This progression can shift with the addition of small amounts of other elements added to the alloy. The best example is adding nickle - the result being 'stainless' steels. Your home table knives are most likely only 0.20% carbon, but also about 0.50% nickle. With alloy steels, as the combination of additional elements gets more complex, so does the basic quality of the metal itself change. It is possible in our modern world to create iron alloy steels with radical handling properties. How you might work up shapes with those alloys also can become more an more complex. For some of the more elaborate alloys, attempting hand forging is basically not realistic.

Many 'display' weapons are in fact made of lower carbon, stainless series alloys. This allows for ease of manufacture, and ability to create a surface with a bright mirrored surface, which does not rust in normal situations.

Only in China : Described as "hand forged Damascus' - retail price at $250 US

b) What (if any) heat treating process was the material subjected to (this applies to most metals).
Final heat treating is a three step process : Annealing (to release forging stress) / Quenching (to harden the metal to a desired maximum) / Tempering (selectively *removing* hardness as desired) Most people don't understand the difference between Hardening and Tempering.
I'm not going into fine detail here (this can be a very complex topic).
Basically, once a iron / carbon alloy (steel) is heated to a specific temperature, the faster you cool it, the harder it gets (up to a maximum determined by carbon content). Differing cooling liquids result in different degrees of hardness.
(As you might guess, there is a huge about of 'mystical hoo-doo' around all this!)
The harder the existing metal, the more effort is required to physically sharpen it.

How NOT to oil quench a blade!

The tempering process on the other hand is a low temperature mechanism. For ease of description, the tempering effect starts somewhat above 400 F. What that means effectively is great care needs to be employed if any power tools (sanders etc) are used in the sharpening sequence. 

What is the blade for? Draw different tempers depending on use.

So without knowing what heat treating process was used, there is no way to easily tell how hard the produced object even is. This means that it may be possible to sharpen it - but no guaranties at all about how durable that edge will remain in actual use.

As you can see, all this boils down to : "I realistically can have no idea how difficult it will be to sharpen your blade - or how good a job can even be done."


Tuesday, October 06, 2020

Iron Smelting with Human power

This overview prepared as background to an interview I will be undertaking on October 7. This is in support of a research project by Amy-Eva Nuttall at the University of Sheffield (UK). For the Master’s Dissertation : ‘Investigation into Bronze Age bellows in literature and experiment’.

My original development of blacksmithing skills included working at a 'Settlement Era' (1850's) living history museum in Toronto. The forge used a 'Great Bellows' - a type standard for that time and place. Over the years, I have worked with later period (1860's +) hand driven rotary blacksmith's blowers on forges - and have several of that type here at the Wareham Forge.
It should be noted that my own experimental work has been primarily related to ‘Late Iron Age’, cultures (Norse, Pictish, Celtic), and focused on bloomery iron smelting. Some testing of bronze casting method (Norse) using historic equipment has also been undertaken in bits and pieces over the years. Bellows have been used extensively in the glass bead making experimental series.

Norse Twin Chamber - ‘Blacksmith’ (4 smelts)

Based primarily on the (well known) Hyllestad Church Carving

There are a large number of commentaries related to this piece of equipment available on this blog :
https://warehamforgeblog.blogspot.com/2008/01/bellows-reconstruction-2.html
I have made at least a half dozen individual equipments based on my evaluation of the two available Viking Age illustrations.
A series of delivery volume tests were made :
http://www.warehamforge.ca/ironsmelting/bellowstest.html

- This bellows has been used over the years on a Norse ‘sand table’ type blacksmithing forge, firing charcoal. It has proved quite effective for general forge work, and capable of generating welding temperatures. 

Viking Age forge demo - Haffenreffer Museum, RI - 2006

- The same type of bellows has been used for a number tests and demonstration of small scale bronze casting, heating roughly fist sized crucibles effectively.

Upper Canada Village Medieval - 2019

- The same type of bellows is used for the series of glass bead making experiments by Neil Peterson . In this case it has proven that care needs to be taken to not produce too much air volume for effective glass working.

Neil Peterson, Megan Roberts - 2008

- At least one set of demonstrations of the 'Aristotle' re-melting furnace used the Norse blacksmith's bellows.

Trillium War (SCA) - 2008

The earliest iron smelts I undertook were attempted with this same bellows. Over four experiments, it was certainly demonstrated that this bellows, which produces on average 120 LpM just did not produce enough air to effectively smelt iron, inside a typical ‘short shaft furnace.

Early Iron 1 - 2004

Norse Twin Chamber - Blacksmith’s linked by bladder. (1 smelt)

This was a single ‘concept’ experiment, where a series of three smaller blacksmith’s sized bellows (described above) were linked to a single large air bladder, then from there into the smelting furnace. Although the overall system proved reasonably effective, the labour pool required was extremely large.

SCA 50 Year - 2015

Norse Twin Chamber - ‘Ubber’ Bellows (6 smelts)

In connection with the experimental series related to the archaeologically proven iron smelt in Vinland (at L’Anse aux Meadows NL) a greatly oversized twin chamber style bellows was built. In this case the form of the Norse illustrations was extended, with the intent of creating a piece of equipment that would produce the air volumes indicated for best function in the short shaft furnace.
This bellows, due to its huge size, was found to be far too punishing on the workers, especially over the many hours of constant operation required for a full bloomery smelt.

with Dave Cox, Keven Jarbeau, CanIRON 5 prep - 2005

Norse Twin Chamber - ‘Smelting’ Bellows (5 smelts)

Based on the work above, a mid sized Norse styled bellows was built. This was used for the ‘Vinland’ series, experiments leading up to demonstrations at L’Anse aux Meadows itself. It also has been used for workshops where either historic setting or lack of electricity has required human power.

Ken Cook, Vinland 3 - 2009

‘Celtic’ Drum Bellows (test only)

A short attempt was undertaken to work up a bellows of this type. The results were not the best, primarily a heat failure of the (plastic!) one way valve used.
https://warehamforgeblog.blogspot.com/2017/06/2-celtic-iron-age-bellows.html

’Chinese’ Box Bellows (partial)

This system was quickly dubbed the ‘Franken-Bellows’. A wooden square box bellows was mechanically powered by an electric motor driving a modified bicycle crank set to convert rotary power to back and forth action. This was only used for part of one smelt (Vinland 2, 2009)

'Franken-bellows' in use, Vinland 2 - 2009


Looking back, I have to date undertaken 85 individual iron smelts. (Plus a good number more as observer or participating as work team for others).
Electrical powered systems dominate - for the obvious problems with any human powered systems of labour required, and effective equipment builds.
- ‘Vacuum Cleaner’ - at least four different types (9 smelts)
- ‘Leaf Blower’ - used in Scotland for the Turf to Tools series (7 smelts)
- The standard electric blower used for all the remaining smelts is a high end ‘compressor’ style blower, (US Navy surplus : rated at 1400 LpM - continuous duty).

It should be mentioned that 'Victorian' hand cranked rotary blowers have been found to deliver high volumes - but at such low delivery pressures that effectively air is not forced into smelting furnaces as required.

There may be some effect from the way Double Chamber (and Box, Drum or Bag) Bellows deliver air in repeated pulses, against the constant blast of mechanical blower systems. At this point this line of experimental investigation has not been undertaken by this team. (I suspect that considerable instrumentation might be required to develop any useful data.)


Although part of a much larger discussion, repeated duplication of nearly identical smelts (same furnace / furnace build, same ore * ) has clearly demonstrated the 'high volume air' effect first documented by Lee Sauder and Skip Williams (2002). With the change from a high volume, constant air blast, blower, effective yields have been found to drop from the range of 25% down to the 15% range. I consider this significant. It is certainly true that ore can be reduced into metallic iron blooms with the use of less efficient furnace builds, and employing lower are volumes. But the overall yields and importantly the quality in terms of density of blooms created with low volume, human powered bellows does not match the known artifact blooms (from the Viking Age, at least). With high volume air, the blooms we create look most like these artifact samples.


* ) This is most clearly seen in the Vinland series, where effective yields dropped from 28% (electric) to 14% (bellows).


February 15 - May 15, 2012 : Supported by a Crafts Projects - Creation and Development Grant

COPYRIGHT NOTICE - All posted text and images @ Darrell Markewitz.
No duplication, in whole or in part, is permitted without the author's expressed written permission.
For a detailed copyright statement : go HERE