Showing posts with label bladesmith. Show all posts

Wednesday, April 03, 2024

the 'French Nail' : Field Expedience

I was recently contacted by a long ago army buddy, who was looking to have some replicas made of an early World War One object. 
Image from the Imperial War Museum

'French Nail' fighting knife ['Clous Français']

The reference he provided was from the Imperial War Museum : https://www.iwm.org.uk/collections/item/object/30003377

These were not 'regular issue' weapons, but were made at the front by blacksmiths working primarily as farriers, who's primary role was shoeing all the horses and mules used for the bulk of transport in that conflict. 

The basic raw material was supplied by converting 'screw pickets', steel posts used for holding strands of barbed wire in entanglements.

Photograph by Lt. J.W. Brooke : 1917-10-23 (IMW)

 The IWM description provides the following dimensions (of the sample pictured above) :

Depth 11 mm

Height 318 mm

Width 54 mm 

Weight 0.314 kg

As is my normal practice, I took the reference image and converted it to life size, and printed off a copy. 

My first surprise is the diameter of the round bar used. I would have expected French metric sizes at 10 mm / 3/8 inch. That 11mm is just a strange size, converting to imperial to 7/16. These knives were also made and used by both British and American troops, where I would expect 1/2 (12.5 mm) stock. Given the few clear reference images I could find of British (hence also Canadian) troops with screw pickets, I decided to use 1/2 round mild steel stock.

In use, the hand would grip inside the ring, around the blade side. The blade would point upwards from the thumb. This allows for a 'low line' stab to the gut. The heavy loop of bar thus runs over the fingers, creating a 'knuckle duster' effect for punches. The knife is primarily a stabbing tool, so the long point is more important than the cutting edges. Simple, brutal, efficient.

From the life size image, I pulled the following additional measurements :

Blade : 20 mm / 3/4 inch wide x 15 cm / 6 inches long

Handle Interior : 80 mm / 3 1/8 long x 30 mm / 1 1/8 wide

The handle interior space was a bit puzzling, being a bit on the small size. I have fairly small hands and would have found the historic sample a tight fit.

The two replicas, upper as diamond / lower as triangle (on 1/4 " grid)

As a primary thrusting weapon, the blade cross section could have been either diamond or triangle - either would produce two cutting edges. The most likely would have been a more standard diamond, but the triangle results in a thicker, and thus more rigid, central spine. None of the images or descriptions I could easily find via the internet specified which. As a forging test, I decide to make one of each cross section. The one closest to the reference sample (smaller hand grip) as diamond. The second replica was made with an intentionally larger interior grip size to fit a more modern physical build, and I used a triangle cross section. I was a bit surprised to find the forging steps required for either turned out to be pretty much the same. The diamond needed forging on four sides, but the triangle I found needed more control with the hammer blows (although admittedly not a shape I make that often).

I also made some trials working 1/2 round into a triangle bottom die. The die I had on hand was more of an equilateral triangle, so not ideal for the wider final shape required. With the proper shaped die made up, the time to forge the triangle cross section would be greatly reduced, and the forging would produce both a significant central spine as well as thinner cutting edges. This most certainly would speed the work if a smith had a large number of requests for this knife. (Worth noting that the sample does not show the more exaggerated cross section suggested by the test pieces I made.) 


Saturday, June 17, 2023

Bloom to Bar to Blade

 As might be expected, I have a large collection of iron blooms, after over 20 years of experimental smelting. With the assistance of Neil Peterson, I have been trying to get a number of at least the smaller pieces compacted down into working bars. So far this has primarily focussed on sections in  500 to 1.5 kg range, basically half or quarter sections of our typical 3 - 5 kg results. (Noting here that there are a number of much larger, still complete blooms in the 8 - 11 kg range, plus the 16 kg monster made at ’65 for 65’.)

table of blooms (2016, so only to smelt #72 of the current 92)
 
Importantly, given the various source ores used, and the many variations on furnace design and sometimes method, the actual carbon content of the individual blooms can vary widely. There is everything from soft carbon free through to ultra high carbon (even to unforgeable cast iron) metals.
Any individual bloom itself is likely to have differences in carbon concentration between the bottom and top surfaces as iron is deposited and held at high temperature, usually for hours.

As any individual bloom is built up, the amount of slag also deposited has been found to vary considerably, from very spongy textures through to quite solid masses. The amount and nature of the initial consolidation hammering is obviously a factor here too.
The process of converting a raw bloom into a working bar most typically follows a process of compressing, folding and re-welding. The normal sequence is :
- flatten to a plate (or ‘book’)
- fold and weld into a ‘brick’
- fold and weld into a ‘billet’
- draw out into a ‘bar’
The amount of force required changes as the iron solidifies. This may seem obvious, but in truth just how light the strokes may be need to be at the start of this sequence is counter intuitive without experience. Even without much force, heavier hammers are best employed, to ensure penetration through the entire mass (for me this means switching from my primary 800 gm to a 1000 gm). As the pieces are forged up, it is almost ensured that the there will be additional welds both along the edges (90 degrees to the folds) and often into diagonal flaws.

All this taken together, results in a bar that will often have a distinctive linear, sometimes distorted, physical texture. Along with potential fine lines of slag inclusions, there are blended lines of changing carbon content throughout. These variations from a uniform structure can be made visible on a final object, especially if the surface is later polished and then acid etched.

Creating a bloomery iron bar requires considerable skill, experience, much labour and expended materials. Taken together, these bars are one of the most valuable materials available to an artisan blacksmith.

So what do you make from these small bars, most in the 200 - 500 gm range?
Generally, the highest value small objects for most blacksmiths are knives.

Now I have mostly stayed away from making blades from my bloomery iron. There are several reasons for this, one being that my work here has always been geared towards understanding early Northern European historic examples, not best possible production yields or aiming for high carbon alloys. Bloomery iron in North America has become completely dominated by the knife makers, where the bloomery process itself is seen as only a first starting step, not an objective of itself (something I remain very unhappy about).

forged blades, rough grind at this stage

To be completely fair, the blade forms here were largely a secondary consideration, with the simple tube handles almost an afterthought. This collection represents objects forged up over the last two (Covid) years, many languishing as rough forged blanks until the last month. All the low polished blades (only to 100 grit) have been lightly etched in ferric chloride to bring up variation in carbon contents within the parent blooms. This shows as either lines or mottled patches, the lightest areas having the lowest carbon content (least effected by the etch). Infrequent slag inclusions that remained show as thin dark lines, especially visible in #6 (which was also the starting bar with the highest variation in carbon content throughout).

detail, #5 Tool

In keeping with my general interest in Norse objects, all these knives are V grinds (not the more modern, if stronger, sabre grind). (1) Both #1 and #2 are commissions, so are based on specific artifact sources. Several are intended for small scale domestic use (textiles or food preparation) and generally conform within Period 4B, type C series from Coppergate, York. (2) The two thick and wide blades, straight backed with sweeping curved edges, are a shape suitable for wood carving (form fitting function).

knives as finished

1) Kitchen / Boning :   20 cm blade x 3 mm thick
                    natural antler (caribou) handle
                    core from DARC 11/08 (sparks roughly 1030+)
                    side slabs from Vinland 4 / 2010 (sparks roughly 1020)
                    ‘replica’ (3) of grave find at Ihre, Hellvi parish, Gotland, Sweden (4)

2) Small Norse Domestic : 10 cm blade x 4 mm thick (distal taper)
                    (owner will apply antler handle)
                    from Vinland 4 / 2010 (sparks roughly 1020)
                    a bit longer, but closest to #2829 from Coppergate


Boning #1 (top) and Small Domestic #2


3) Small Carving :      8 cm blade x 5 mm thick (distal taper)
                    natural walnut branch handle
                    from Slag Pit 2 / 2011 (from higher carbon end of the bar)
                    no specific prototype

4) Medium Kitchen :   13 cm blade x 2 mm thick (distal taper)
                    natural walnut branch handle
                    a bit longer than the samples, again roughly P 4B / T C from Coppergate
                    from Aristotle Furnace demo at CanIRON 9 /2013 (sparks roughly 1075)


Small Carving #3 (top) and Medium Kitchen #4


5) Tool :             10 cm blade x 5 mm thick
                    natural antler (caribou) handle
                    from Slag Pit 2 / 2011(variable carbon)
                    no specific prototype

6) Small Kitchen :      9 cm blade x 3 mm thick
                    natural antler (caribou) handle
                    again roughly P 4B / T C from Coppergate
                    from Aristotle Furnace demo at CanIRON 9 / 2013 (sparks roughly 1075)

Tool #5 (top) and Small Kitchen #6

The most probable destination for these knives will be as working tools into the hands of other members of DARC, many of whom have contributed their labour during the iron smelts that created the starting metal.
I will be offering knives # 3 - 6 for sale at the upcoming SCA ’Trillium War’ event over June 30 - July 3. The prices can be expected to be steep however, in consideration of the genesis of the material.


1) I don’t want to get into (yet another) argument here about whether ‘seax’ only refers to the ‘broken back’ shape, or any Norse knife. See an earlier commentaries:
2007, ‘Knives from the Viking Age’
http://www.warehamforge.ca/norse-knives/index.html
2010, ‘Knife? THAT'S not a knife…’
https://warehamforgeblog.blogspot.com/2010/03/knife-thats-not-knife.html

2) Ottaway, P., 1992, ‘Anglo-Scandinavian Ironwork from Coppergate’, 1 872414 29

3) I don’t want to get into (yet another) argument here about ‘reproduction vs replica vs interpretation’. If interested, see a detailed commentary about these differences :
2020, ‘Reproduction, Replica or Interpretation’, in ‘The Iron Trillium’, Fall issue, Ontario Artist Blacksmith Assn.
https://warehamforgeblog.blogspot.com/2020/09/reproduction-replica-or-interpretation.html

4) Carlson, D., 2003, ‘Viking Knives from Gotland Sweden’, plate ‘Iron knife6’ (top), 91 973304 5 0


Friday, February 18, 2022

Courses into 2022

 February 2022

This is a general reply to those who have contacted me about the possibility of undertaking blacksmithing and related courses at the Wareham Forge.


• First General Reminder :

I do not offer any courses over the winter months (mid November to end March). There is no heat in the workshop!

Into 2022, I have a major project for Parks Canada which will require the majority of April through June.
So I will only be available (at point of writing) for potential dates beyond July 1, 2022.


• Second :

I normally frame up my year's course schedule in February.
Please refer to the information kept (reasonably) current on the main web site :

http://www.warehamforge.ca/TRAINING/train.html

Please be advised that there are going to be changes to the indicated fees and details on content / student numbers.
The final costs must be quoted directly via a current e-mail, those on the web site only serve as a guideline.

The general guideline on pricing will be :
- If two individuals book a session together
    Use the quoted rate for each student (no price reductions)
- If a single student books a two day session
    I will be offering discount from the posted $300 per day, to $250 (x 2 = $500+)

Note that these are not hard quotes, as some courses do have additional materials related costs which will remain in effect.

Heading into 2022, I expect I will be primarily setting courses as based on request / interest - for the majority NOT to a fixed schedule. This may allow more flexibility for available weekend dates?
This may result in the creation of more 'private session' courses.


• Third Consideration

I have never offered 'fast start' or 'make a thing' = 'experiences'.
(And those interested in blacksmithing are strongly advised NOT to mistake such offerings as actual instruction!)

I hit 65 in November of 2020. Primarily for that reason, I am not intending to continue with the basic level programs (Introduction to Blacksmithing / Basic Bladesmithing, as open registration weekends
I will continue to offer the higher level and special interest programs, for most of these, I remain the only available instructor, certainly in Ontario (in many cases the only in Canada).
My hope is that my own desire for teaching will set the pace and selection of courses offered (not mere income reasons).
If you are interested in starting level courses, refer to the other quality instructors given at the bottom of this note.

    Three B

BEWARE 'FORGED IN FIRE'
This is an entertainment - NOT any depiction of reality.
See my commentaries on this blog :

Saturday, October 31, 2015
Saturday, March 18, 2017

• Fourth

The situation with COVID-19 continues.

No individual is allowed access to the Wareham Forge unless they have received two vaccines plus booster
Period.
No discussion.


I personally will be remaining in effective lock down, here at (rural) Wareham, with full expectations to continue this (with Omicron) into at least early 2022 and beyond into the foreseeable future . Since this all started, we have been keeping to a roughly three to four week cycle for supplies, with only trips into our local village for bank / groceries / hardware. We have completely avoided urban centres, with only Owen Sound on a roughly 3 - 4 month cycle.

I was (finally) able to secure my third, booster shot on January 16. This combines to make me at least somewhat protected. However, as I have existing lung damage (and age) as contributing risk factors, I remain cautious.

There are two published commentaries available - it is highly recommended that you read these:
On the main web site : http://www.warehamforge.ca/TRAINING/COVID.html
I keep this general information current on a monthly basis
On the blog : https://warehamforgeblog.blogspot.com/2020/06/distancing-at-wareham-forge.html
This is a general commentary about distancing and teaching at the Wareham Forge.

the main elements determining the situation for courses are these :

1) Reduced benefit to students : correct social distancing, although (barely) possible, do NOT make for effective instruction.

2) All the risk is carried by the instructor : I have been pretty much isolated since March 14, 2020 - have you?

Expect at best extremely limited selection and availability for enrollment in courses here at the Wareham Forge until an effective vaccine protection and reduced infection rates related to COVID - and its developing variants, is certain.


General Advice :

I do recommend anyone interested in blacksmithing training carefully examine the past experience of those offering courses. A large number of what can only be considered 'entry' level workers have been, frankly, 'cashing in' on the current popularity of blacksmithing and mounting short duration 'experiences'. Teaching is also a skill. The recent trend to 'giving people what they want' is foolishness in my opinion (against some 40 years teaching experience). My recommendation is that you examine closely the workshop facilities, quality of past work and teaching experience of the instructor before booking any kind of metalworking program.


Friday, April 09, 2021

Death of the Expert


Death of the Expert

(a bit ? of a rant !)

This is a slightly reduced / edited version of a commentary piece prepared for the current issue of the Ontario Artisan Blacksmith Association quarterly newsletter, the Iron Trillium.This segment follows directly from 'Life on a 3 x 6 inch screen'. If you have not done so, also read the initial background piece in a previous blog posting.


As Artisan Blacksmiths, Just who are we?

And what exactly is it that we do?


There are a number of reasons, personally, why this all has been at the forefront of my mind over the last couple of months. With the restrictions imposed by COVID, coupled with my own individual risk factors, the ability to (safely!) offer workshop courses at the Wareham Forge had simply ended. I turned 65 in November 2020, so have entered some kind of fuzzy ‘retirement’, (with at least OAS coming in to keep the lights on). Increasingly, I find myself looking back on to over 40 years at a forge at this point: from student, to hobbyist, to ‘artisan interpreter’, into a full time business (over 30 years).

I do appreciate that there will be a wide range of perspectives held by those reading this commentary (sorry, but mostly based on generational age).

So here are some things I’ve seen over March 2021 (!!) and why they concern me:


The spark (that set me off) was this. Honestly, not so much what this is - but how it was reported, and spread around.

This is a video, with no commentary, of some guy (from Sweden it turns out) who forged out a (not very good) Viking Age styled bearded axe. All working on a stone block and using hand held stones as hammers.

For why would you do this?

This video was distributed through a number of topic specific groups over Facebook that I see : Axes, Hatchets / Viking Blacksmithing / Viking News / Iron Smelters. Every time with a description like ‘Look! So Cool!!’. That last bit was the final straw for me. My comment to the Iron Smelters of the World group :

“ Look at ME! I did something!!' : Sorry, there is just too much historical distortion going on here. NEVER would have actually happened. (Please do not quote Africa) There is easily 1500 years of iron making and use in North Europe before the Bearded Axe. “

Here is the link to that video - go take a look and come back…

https://www.youtube.com/watch?v=KI6l2WqIlD0

  • He starts with what looks like a roughly two foot long piece, of mild steel, a 1 x 1” bar. (As if this was available historically?)

  • It certainly looks to me like he has metallurgical coke as his forge fuel (Not used in the same time period as the axe.)

  • It also is clear he has an electric blower air source. (Electric blower - and rocks??)

It was pointed out to me : ‘He is just having fun.’ 

Ok - that is true, perhaps.

But that at core is not my problem here. It is the way this bit of silliness has been promoted, both from himself and most certainly by others. On quick examination, this fellow has over a dozen similar content videos (steel forged with stones) posted since November 2019.

This kind of presentation is entirely about a ‘cult of personality’. There is no information presented about What or Why, the details of How obscured. (1)


About two years back, there had been some discussions inside the OABA Executive about expanding our visibility on Facebook. This partially in light of the level of activity on this group ‘Canadian Blacksmiths and Bladesmiths’, which started in 2015. I do regularly check the additions there, and try (??) to be a ‘wise voice’ contributor.

Now, I have every reason to support the original intent of those who undertook the effort of starting this open 'discussion' group. Over the last two years however, I have seen a dramatic shift in both the offered content, and the level of discourse, exhibited there.

The joint impact of ‘Forged in Fire’ and the effect of COVID derived free time is clear. The group has become totally dominated by knife grinders. Deliberately chosen to distinguish those who cut and grind alloy bars and put handles on them. At this point about 50% of the contributions are illustrating this kind of work. (2) Further, more and more of the ‘contributions’ are little more than thinly disguised advertisements for direct selling.

This image was presented with the caption ‘One day’s production’. (2)

Think on this.

One. Day.

  • There is absolutely no black smithing involved.

  • There is almost no blade smithing involved. The only application of heat (implied) is through the heat treating cycle, which is suggested will be undertaken by the maker (at least not sent off to a commercial company).

  • There is clearly considerable knife making (grinding) involved.

  • But what is the *scale* of production? Where is the line that crosses between *hand* and *machine* made?

Is there any significant difference between a single person using industrial methods, or a larger factory with dozens of workers employing larger, but essentially the same, machines? Especially when the end product is a series of virtually identical objects? (Yes, I do understand there will be variations in handle materials, although those profiles are likely to be identical as well.)


Back to my starting premise : ‘The Death of Expertise’

I point you to a commentary by Tom Nichols, dated January 17, 2021. This posted to ‘the Federalist’, obviously a Right Wing slanted publication out of the USA. (bias in this article noted, ok?)

https://thefederalist.com/2014/01/17/the-death-of-expertise/

The main thrust of this piece is related to, admittedly, American democracy. But take this statement :

“ To reject the notion of expertise, and to replace it with a sanctimonious insistence that every person has a right to his or her own opinion, is silly.”

When I first made reference to that article, I happily got back a link to another commentary - one that points exactly to a shared involvement in blacksmithing. This is a video presentation by Allen ’Ronin’ Rozon, of Lames Original / Origin Blades from Saint Patrice de Beaurivage Quebec, a blacksmith and bladesmith. (3)

https://www.facebook.com/OriginBlades/videos/2596577493990874

Here is a discussion of roughly the same topic, but nicely broken down to : ‘those that watch from a distance’ (armchair expert), ‘those who directly experience’ (via demonstrations or courses), and ‘those who know’ (skills developed through massive repetition).


Now as blacksmiths ourselves, we all know (or should know) the difference between the ‘doer and the thinker’. How often have we all seen someone demonstrate a technique or an object, yet when attempting this ourselves suddenly realize just how difficult it is to accomplish? (Honestly, this has become an important guide for me. Any time I see someone doing something that looks ‘easy’, I attribute this to long hours spent acquiring skills - NOT to the simplicity of the task!)

Or is what is seen on YouTube (increasingly) just good video editing?


I’m going to follow this up with a trend I see increasingly with web sites recently : All Flash - No Substance.

The most recent trend on web sites is to bend entirely to the whims of the ‘lowest common denominator’.

  • Minimalist layouts.

  • Virtually no text.

  • Obviously designed for that 3 x 6 inch phone screen.

  • Business names, but the individual not identified (or name buried down into the site someplace at best).

  • Lack of any description of related experience

Additionally, I see the use of a few, admittedly professionally photographed, objects being presented, instead of any attempt at detailing a large body of work.

I see ‘courses’ defined as being not teaching, but as ‘experiences’, with little description of the content, no mention of the facilities used, or who the instructor even is, much less what background they might have.

I personally have enough experience that I can see the huge distortions from what is intentionally not being made clear, allowing viewers to draw conclusions that do not represent the truth.

Look, I do understand I am a dinosaur (or at least remember seeing them). My concept of the internet comes from the period of it’s birth and development, when the fledgling web sites were mainly text with few (poor quality) images. When the intent of the whole thing was about sharing information. Before it all became about driving sales, or even worse, data mining personal details to allow individually targeted marketing. Increasingly it is clear that those endless ’SEO Specialists’ are driving the whole internet into mindless commercialism.


Just who are we?

And what exactly is it that we do?

And how do we explain this? 

 It is clear that the public perception of ‘value’ has become determined by effective visuals, and ‘authority’ by volume as indicated either ‘number of views’ or ‘frequency of posting’. It is also apparent that this perception has extended beyond the superficial glance of the general public, increasingly to those who have a more direct interest in our specific topic and area of work.

I’m going to suggest, from the perspective of 30 years involvement in the ‘Arts and Crafts’ sector, that this dumbing down of presenting work, a drive to ‘capture market’, is going to result in the general public also devaluing the work we all undertake.


What can we all, individually or as members of an Artisan Community, do about this?

Is it far too late to have any impact?

Or, do we even care?


Note : Many of the viewpoints here are presented in a dramatic fashion. This done intentionally to spark discussion. Feel free to criticize and offer alternatives.

The images seen here were pulled directly off open public postings on Facebook, Identifying names have been removed - for obvious reasons.


Notes / References

1) A deeper search revealed that this is all part of a doctoral thesis at the University of Gothenburg :

https://www.gu.se/en/about/find-staff/gustavthane

“ In my ongoing research, I make blacksmith tools; start with the tools given by nature, my own hands, stones and sticks, and then use the tools to make other tools, use those to make others etc. in four generations. “

He describes his experience as ‘making objects professionally for 10 years’.

Although I well understand the concept of what is now called ‘sole authorship’ in Fine Arts, I suggest that this kind of mixing of modern and ancient process as if this was some kind of valuable research is self indulgent (at best). The stated premise for this study is so full of holes, I can’t realistically understand how it was ever accepted as a formal thesis.

2) A (small) apology to the owner of this image. This intentionally un-named individual actually also does also create his own layered steel billets (via hydraulic press) and forge those (power hammer) into blade blanks, which he then finishes into knives. This is all top quality work, with excellent attention to detail.

3) Like an increasing number of people ‘Ronin’ choses to separate his Facebook identity from his professional / business identity.

https://www.facebook.com/OriginBlades

https://originblades.com

Wednesday, December 30, 2020

Illustrations of Forge Welding

 ‘Don’t try this at home kids!’

This piece originally written for the Iron Trillium - Ontario Artist Blacksmith Association


This is the start of my current discontent :


On an estimate, this stack appears about 1 wide by about 3 1/2 + tall by 10 + inches long. (1)

Do any of you see the potential problems here?

I had made a general comment after that first image was posted up on the open discussion :

“ (curious) Are you using a press? Otherwise don't you have problems with the layers 'humping' (*) and making gaps, as you hammer towards the rigidly fixed sections? “
And guess what?
Later there were questions asked ; ‘ Why where there de-laminations of the forge weld? ‘ Which were (predictably) shown to the far end of the billet, to the outer portion of one side. Yes, this was hand hammered (there was a video clip added later as well). Honestly, I considered the hammer choice and the technique shown was just - well, pretty bad (and most likely to aggravate the ‘humping’ problem I mentioned).

Observation # 1 : Don’t believe what you see on the internet. 

Remember that ’90 % of everything is Junk’. (2)

Here is the thing :
You do want to use some method to hold the pile of strips together.
Yes - there is that traditional Japanese approach, where you have what is basically a paddle (rectangular piece on a handle), on which you place a loose pile of plates or pieces. Then oh so carefully heat, then lift over to the anvil, striking with a very wide faced (specialized) hammer to weld. Using great skill not to jumble (much less drop) any of the small pieces.


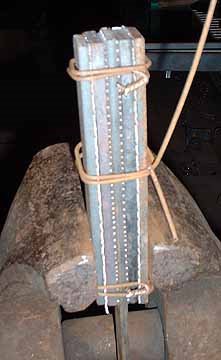
I learned to prepare my stacks well before I ever had access to a modern electric welder, using several wraps of wire to hold the pieces together. This of course meant I had to pull off the wire loops after the first tack weld course. The wires would certainly weld into the top and bottom surfaces, but would end up bulging out and off the sides. Yes, you do have to use some extra care when heating to welding temperature, that you don’t just burn the wires away. (I find plain ‘black’ electric fencing wire ideal here.) Yes, this certainly adds an extra step, fixing the welded block in the vice and ripping the fragments of wire off. 


An extension of this method would be using a box shaped collar, which would be knocked free once one end of the billet was at least tack welded. (3)

These days, truth be told, I have a big MIG welder, and I usually run a bead fusing one end of the stack together - and also at the same time applying a long bar as a working handle. I personally do this along one end of the plates, not multiples down the sides as seen above. This because the MIG process will ’smear’ the metals combined in the stack, which I certainly don’t what contained in the final layered billet. In practice, I’ve found that I usually get some cracks in the welded pile where the handle is attached anyway. (This primarily because the handle itself acts as a cold shunt.)

Here two pieces of flattened iron bloom, MIG welded to a handle

Fixing the pile at one end, allows you to run your hammer blows from that point down and away to the open end. This will squeeze out excess flux, and importantly any remaining oxide or dirt, as you hammer from centre to edges, working sequentially down the stack.

Look at the measurements of the stack in that first image yet again :


  • Ideally you want your stack of plates to be *square* in cross section - the height of the stack being the same as the width of the individual bars. This is simply to make sure that you are getting even heat penetration throughout the the whole stack. (4) You can see quite clearly here that the starting stack is easily three, perhaps four times as tall as it is wide!
  • Ideally you want the strips in your stack to be roughly the same width as your hammer face, or not that much wider. (Does not necessarily appear a problem here.) This so you can quickly, and effectively, overlap individual hammer strokes. This to both ensure all parts of the stack get effective hammering, but also to ensure you squeeze out that same flux / impurities from between the plates.
  • Ideally you want to limit the overall length of your prepared pile. There are two reasons here. First is to ensure that the whole pile will come up to both the correct, and importantly a uniform, temperature suitable for effective welding. (In this case, it was later shown the individual was employing a propane gas forge. There are other potential problems / method adjustments required for effective welding in a gas forge. One clear advantage is that in a well designed unit, typically internal temperatures are quite even throughout.) (5)
  • The second reason to reduce the length of your starting stack is simply based on ‘how fast can you hammer’? Remember that your stack, especially for that first weld, is rapidly cooling as soon as it leave the forge. The outer layers especially. Even more so the bottom most ones, in contact with the cold anvil. You can mitigate this somewhat by letting the most distant part of the stack hang off the anvil, pulling the stack back towards you as you hammer, more or less in the same spot. (So moving the billet, not chasing the hammer over the surface.) But any way you look at it, you can only work so fast! I would expect anyone would find the temperature would have significantly dropped before they would reach the end of such a long stack (6).

This all suggests that there potentially would be welding flaws most likely to be found to the far end of the stack (away from the handle) and towards the outer surfaces, especially to what ever surface was placed down to the anvil.  ( Guess what ended up happening here? )

( * ) ’Humping’

Ideally you would want to start on the part of the stack closest to you, pushing any flux / debris out of the layers and squirting this away from your body. Because the top layers are directly under the hammer, these distort the most, certainly more than the bottom layers (where the force has to be distributed down through the loose stack of plates. This is going to effectively cause those upper plates to stretch longer than those at the bottom. If you have fixed by welding at this starting point (or have a loosely held wire bundle) This does not present much of a problem. But if you have secured the entire stack with multiple weld lines as seen, what will happen is that as those top layers are effectively forced longer, they will shift forward and then bulge away from the lower plates. If you worked extremely fast, with very careful control of the hammer striking angle, you might be able to both limit and adjust for this as it happens. But given that there is no functional reason (that I can think of) for running multiple securing MIG beads to begin with? ( 7 )

I should also mention (although you must believe me here, see note 1) that in the short video showing the initial weld sequence, the hammer technique is, well, questionable (at best). The smith is striking with the hammer at  a pronounced diagonal stroke. This is certain to impact more distortion force to the upper plates. If the hammer was coming in flat, at least the force would be directed straight down through the entire stack, rather than squeezing the plates forward. Additionally, the physical motion shown is simply horrible. The smith is striking with the left side edge of the hammer, arm away from the body, elbow lifted. This creates a kind of sweeping motion, rolling the wrist. And using what certainly looks like a 1.5 to 2 kg hammer (?).

'Hero' shot of me forge welding (actually a billet of bloomery iron being compacted).

My own experience has been that for the best results, is to run at least two (ideally four) welding courses. I first use the lighter, better controlled, and way faster, 800 gm hammer. I will usually do this twice, giving both the top, then the original bottom, surface a chance to be ‘up’. I consider these to be ‘tack’ welds, securing the individual plates together. Next I will repeat this combination, switching to a ‘next heavier’ hammer (for me this the 1000 gm - I find I can’t move the 1500 with enough speed or control). This ensures deep penetration and sold welding through the entire block.  (Again your mileage may vary here)

Over the years, there has been a LOT of discussion on ‘the right way to forge weld’. Frankly ‘It works for me’ may be the most common statement. There is some science behind this (not what most people think, either). Working *clean* is most certainly the best single piece of advise.
(see a blog post )


Right now I think we all are seeing an absolute explosion of people thinking that now is the perfect time to attempt to turn their hobby into a ‘paying business’. Throwing money into high powered equipment, in place of developing any hand skills. There is a possibility that for a very, very small number, this might actually succeed. Knife *making* (7) is most certainly the ‘flavour of the month’. I’d bet this also annoys OABA members who have been forging blades for years.


1) I’ve specifically chosen not to credit the individual who provided this image, or the later process images / descriptions. (This to remove any possibility of bad feelings over my opinion - this is not from anyone in OABA, or even Ontario btw.)

2) ‘Sturgeon’s Law’ : coined by science fiction author Theodore Sturgeon

3) If you look at Scott Lankton’s several publications describing the making of his Sutton Hoo sword replica, you will see this use of sliding collars.  (available as a pdf)

4) It is actually a bit more complicated that this. The differing carbon contents / alloy composition of the individual bars may also have slightly different ideal welding temperatures. Ideally you want to place either ’sacrificial’ strips, or the metal with the greatest tolerance against overheating, on the outsides (top and bottom).

5) I personally learned to forge weld in a ‘traditional’ coal forge - and continue to this day using coal as my primary method. The size of my fire box has been found to be most effective for welding billets up to at most 6 inches long. My normal starting stacks are roughly 1 1/4 x 1 1/4 x 5 inches long, which I find gives me the best results (your mileage may vary!).

6) Any of you who have seen me demonstrate certainly have noticed that my normal stroke rate is about double of most people. (This due to the ‘high and fast’ circular motion / technique that I use.) Again I find that for anything over about 5 - 6 inches, even this fast method will  just not allow enough time to place the correct sequence of blows over the surface, before the metal has dropped below what I consider an effective welding temperature. (again, your mileage my vary!)

7) On later reflection, there is a possibility that occurred to me, coming from the use of the propane forge. The tight clamping and securing the individual plates may be an attempt to limit oxygen penetration onto the inner surfaces of the plates. (We all know that an oxide scale surface will not weld?) There are a number of reasons that I personally do not consider gas forges ideal for welding. Individual experience is most likely to differ (Good equipment design a critical factor). I will suggest that binding plates together is not a substitute for correct use of a fluxing agent.

8) I (strongly) distinguish between ‘knife making’ (grinding bars to shape and adding handles) and ‘blade smithing’ (forging bars to close profile). This becomes especially clear with much  seen of recent layered steel blades. Billets that have been hand forged will show distortions from this process, which is part of their specific character. Surfaces with geometrically perfect lines obviously have to be ground to shape (often from purchased billets, themselves created using presses).
More fuel for the ‘that’s not blacksmithing’ debate ?


February 15 - May 15, 2012 : Supported by a Crafts Projects - Creation and Development Grant

COPYRIGHT NOTICE - All posted text and images @ Darrell Markewitz.
No duplication, in whole or in part, is permitted without the author's expressed written permission.
For a detailed copyright statement : go HERE