www.warehamforge.ca/ironsmelting/double0607/
Includes a number of images and field drawings. Expanded from my earlier post here.
The smelt data sheets are missing at this point, but will be added as soon as I get the raw information and format it into the standard tables.
Saturday, June 23, 2007
Thursday, June 21, 2007
A Re-Enactor's Design...
Posted by: "Catherine Olanich Raymond"
>> Any one of the folks that smelt or forge recognize this from a grave
>> find or some other reference:
>> ...he looked at
>> Birka grave finds and saw no mention...whereas other sites selling
>> them seem to consider them somewhat authentic.

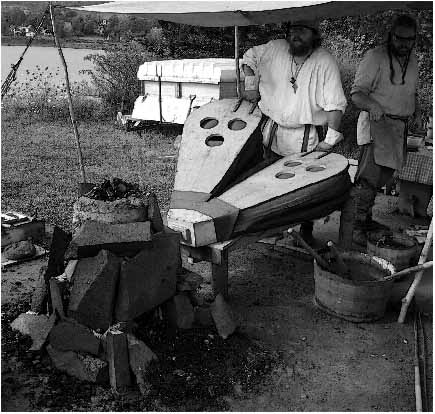
Sorry - that is a purely modern style. What I have seen made by both black powder and many a pre industrial re-enactor. Very commonly seen in the SCA.
It is extremely loosely based on the ** concept ** of Romano - British table or kitchen knives. The artifacts date to roughly 450, there are several samples in the Royal Ontario Musuem in Toronto.
However, the actual artifact blades are significantly different. They are forged of one piece of metal flat stock. One end is drawn to a point and then the edge is forged out for the blade - which slightly widens the blade portion. There are a couple of different blade profiles evidenced, but long triangle (standard kitchen parring knife) or some variation on clip point are most common. The material that forms the handle may be treated in a couple of different ways, generally thinned out or contoured to fit the hand a bit better. Many have a small loop on the very end to allow them to be hung on a wall peg.
What is seen in the sample is a very nice overall design. Its just not found in the artifact record.
Check:
www.warehamforge.ca/norse knives
(Start of a potential reference I am working on...)
>> Any one of the folks that smelt or forge recognize this from a grave
>> find or some other reference:
>> ...he looked at
>> Birka grave finds and saw no mention...whereas other sites selling
>> them seem to consider them somewhat authentic.

Sorry - that is a purely modern style. What I have seen made by both black powder and many a pre industrial re-enactor. Very commonly seen in the SCA.
It is extremely loosely based on the ** concept ** of Romano - British table or kitchen knives. The artifacts date to roughly 450, there are several samples in the Royal Ontario Musuem in Toronto.
However, the actual artifact blades are significantly different. They are forged of one piece of metal flat stock. One end is drawn to a point and then the edge is forged out for the blade - which slightly widens the blade portion. There are a couple of different blade profiles evidenced, but long triangle (standard kitchen parring knife) or some variation on clip point are most common. The material that forms the handle may be treated in a couple of different ways, generally thinned out or contoured to fit the hand a bit better. Many have a small loop on the very end to allow them to be hung on a wall peg.
What is seen in the sample is a very nice overall design. Its just not found in the artifact record.
Check:
www.warehamforge.ca/norse knives
(Start of a potential reference I am working on...)
Sunday, June 17, 2007
Ceramic Tuyeres for Smelting?
> I have been trying to run down the kiln shelf supports that we used for
> the air intake in the smelting furnace. However, I am told the round
> ones are not made any more and now they make triangular, square ones
> Do you know a source that makes and sells these round kiln posts?
I get the supports from a place in Kitchener ON. This is an outlet of a
larger company:
the Pottery Supply House
1120 Speers Road
Oakville ON, L6L 2X4
800-465-8544
mail@pshcanada.com
www.pshcanada.com
The units I purchase are:
FRP12 - 12" T175 Round Post (at $6 CDN plus taxes each)
The company does do mail order via phone or web site using credit cards.
These are supports for a PORCELIN kiln - higher temperature, I thnk
rated for 1150 C. You can contact the company direct and they may be
able to refer you to an American supplier (although these mail easy enough).
Now, I suspect that the interior diameter as round and at 1" size is the
critical thing. Likely the exterior shape does not matter. The artifact
samples are all cylinders or more commonly conical. This is mainly
because how they were made. You take a blob of clay and work it around a
stick with your hands and then either burn or more likely just pull out
the stick.
If you used a square or triangle shape, I'd suggest placing it so one of
the edges was uppermost - rather than one of the flats. Watch the
minimum wall thickness too. I can see a circle inside a triangle perhaps
leaving a thin side wall.
Ideally the air blast is cooling the tuyere material and keeping it from
melting. So with a constant blast from a mechanical blower the tube
shape may be of less importance.
Saturday, June 16, 2007
Historic Iron Smelting - Questions & Problems
Again a piece re-cycled from NORSEFOLK )
REVIEW - What it is: IRON SMELTING
Smelting is the process of taking raw iron ore and converting via extremely high temperatures into a mass of workable metal. In the European 'Dark Ages' (post Roman through to the Crusades) the technology is roughly similar. A quick overview : The furnace used has heat resistant walls and is roughly the size of a 5 gallon pail on the inside (likely a bit taller). Inside this air is forced through a hole or pipe (the tuyere) to allow charcoal to burn. This not only produces the temperatures required (roughly 2400 F / 1100 C) but also produces the various gases required for the chemical changes. If everything goes EXACTLY right, after four to six hours the bottom of the furnace will have a bowl of glassy slag with a mass of metal (the bloom) resting inside of it. In Viking Age Scandinavia the ore type is almost always some variation on primary bog iron ore and smelters are located close to the source. Exact raw material preparation, charcoal used and smelter construction are then adjusted to relate all these locally available elements.
The bloom then needs to be extracted. It will have a lacy outside layer, which needs to be either hammered off or compressed into the bloom. Then the mass needs to be cut into pieces small enough to be worked by hand. Next the pieces are compressed to blocks, then worked into bars by repeated hammering, folding and welding. (Al this hammering is why the product is called 'wrought' iron )The end result is a 'currency bar' - typically about 2 cm square and about 30 - 40 cm long (say 3/4 x 12 - 18 inches). These bars are often seen flattened on one end and with a carry loop on the other. (This is how you blacksmith's purchase your metal buy the way - consider how this relates to producing that darn tripod.)

Problems:
The physical remains related to iron smelting from the Pre Conquest period are * extremely * limited:
- The furnaces themselves are relatively fragile, and so only the simplest remains are likely. With a clay furnace the upper sections (from just below the tuyere entry and up) will be baked to a simple ceramic. This is very porous, and water plus freeze and thaw quickly shatters it into a pile of small fragments. Only the very base of the cylindrical smelter is normally found. As this is not exposed to heat, what you find is a ring of mud.
So : what is the exact shape and layout of the furnace? It turns out that position of the tuyere and total height are quite important.
- Tuyere tubes or fragments are found. They almost all have a uniform interior diameter of 2.5 cm / 1 inch.
- The glassy bottom 'slag bowls' are found. Often located such that they are as they were formed at the base of a smelter. (Often the only indication of the size of the smelter or rough guide to the size of the bloom which was produced.) Problem here is that these are only the frozen remains formed at the very last stage of a complex series of chemical and physical reactions over a furnace use of several hours.
- Some finished blooms have been found. This does give us some idea of possible bloom sizes and quality. A range of roughly 5 - 8 kg seems to be common for the Viking Age.
So : why are these specific blooms recovered at all? Given the effort ("cost" in labour in materials) is there some specific reasons these blooms were retained or even discarded?
- No bellows remains from the Viking Age (at least after serious digging I have be unable to find a single artifact). There are two carved illustrations of * blacksmith * bellows. One is a side view with human figure for (possible) scale. The other a top view for proportions.

To mess this all up, modern experiments have demonstrated that the air volumes required for a successful smelt (producing an artifact type bloom) require something in the order of 5 times the volume of air possible from that blacksmith bellows.
So : are we looking for a different sized bellows? Are small bellows ganged together? Maybe an entirely different design? Maybe even an entirely different smelt sequence? All these have social implications as well, what evidence may there be of that aspect?
- There are no tools specific to the smelting process that have been found. (Again, I have not seen anything *** PLEASE !!!! *** if anyone knows of any, let me know!) We know from our own experiments that a number of specialized long handled probes, hooks, rakes - if not out and out necessary. Some of these need to be all metal to allow them to be driven by hammer blows. Add special oversize 'bloom tongs'. Heavy hammers are required, but at least other finds (like Mastermyr) show those. There are a number of wooden buckets and scoops that are either standard or would not leave any trace.

So : Are there any specialized 'smelt master' burials? Were ALL the large metal tools re-cycled? Is there some social reason why smelting tools were treated differently than blacksmithing tools? (Conversations with Dr. Kevin Smith suggest that this may be the case ?)
- There are no specific clothing items that have been found that relate to the very real protection problems quite specific to iron smelting
So : I'm going to put that into another post!
Darrell
A reference:
www.warehamforge.ca/ROMiron
REVIEW - What it is: IRON SMELTING
Smelting is the process of taking raw iron ore and converting via extremely high temperatures into a mass of workable metal. In the European 'Dark Ages' (post Roman through to the Crusades) the technology is roughly similar. A quick overview : The furnace used has heat resistant walls and is roughly the size of a 5 gallon pail on the inside (likely a bit taller). Inside this air is forced through a hole or pipe (the tuyere) to allow charcoal to burn. This not only produces the temperatures required (roughly 2400 F / 1100 C) but also produces the various gases required for the chemical changes. If everything goes EXACTLY right, after four to six hours the bottom of the furnace will have a bowl of glassy slag with a mass of metal (the bloom) resting inside of it. In Viking Age Scandinavia the ore type is almost always some variation on primary bog iron ore and smelters are located close to the source. Exact raw material preparation, charcoal used and smelter construction are then adjusted to relate all these locally available elements.
The bloom then needs to be extracted. It will have a lacy outside layer, which needs to be either hammered off or compressed into the bloom. Then the mass needs to be cut into pieces small enough to be worked by hand. Next the pieces are compressed to blocks, then worked into bars by repeated hammering, folding and welding. (Al this hammering is why the product is called 'wrought' iron )The end result is a 'currency bar' - typically about 2 cm square and about 30 - 40 cm long (say 3/4 x 12 - 18 inches). These bars are often seen flattened on one end and with a carry loop on the other. (This is how you blacksmith's purchase your metal buy the way - consider how this relates to producing that darn tripod.)
Problems:
The physical remains related to iron smelting from the Pre Conquest period are * extremely * limited:
- The furnaces themselves are relatively fragile, and so only the simplest remains are likely. With a clay furnace the upper sections (from just below the tuyere entry and up) will be baked to a simple ceramic. This is very porous, and water plus freeze and thaw quickly shatters it into a pile of small fragments. Only the very base of the cylindrical smelter is normally found. As this is not exposed to heat, what you find is a ring of mud.
So : what is the exact shape and layout of the furnace? It turns out that position of the tuyere and total height are quite important.
- Tuyere tubes or fragments are found. They almost all have a uniform interior diameter of 2.5 cm / 1 inch.
- The glassy bottom 'slag bowls' are found. Often located such that they are as they were formed at the base of a smelter. (Often the only indication of the size of the smelter or rough guide to the size of the bloom which was produced.) Problem here is that these are only the frozen remains formed at the very last stage of a complex series of chemical and physical reactions over a furnace use of several hours.
- Some finished blooms have been found. This does give us some idea of possible bloom sizes and quality. A range of roughly 5 - 8 kg seems to be common for the Viking Age.
So : why are these specific blooms recovered at all? Given the effort ("cost" in labour in materials) is there some specific reasons these blooms were retained or even discarded?
- No bellows remains from the Viking Age (at least after serious digging I have be unable to find a single artifact). There are two carved illustrations of * blacksmith * bellows. One is a side view with human figure for (possible) scale. The other a top view for proportions.

To mess this all up, modern experiments have demonstrated that the air volumes required for a successful smelt (producing an artifact type bloom) require something in the order of 5 times the volume of air possible from that blacksmith bellows.
So : are we looking for a different sized bellows? Are small bellows ganged together? Maybe an entirely different design? Maybe even an entirely different smelt sequence? All these have social implications as well, what evidence may there be of that aspect?
- There are no tools specific to the smelting process that have been found. (Again, I have not seen anything *** PLEASE !!!! *** if anyone knows of any, let me know!) We know from our own experiments that a number of specialized long handled probes, hooks, rakes - if not out and out necessary. Some of these need to be all metal to allow them to be driven by hammer blows. Add special oversize 'bloom tongs'. Heavy hammers are required, but at least other finds (like Mastermyr) show those. There are a number of wooden buckets and scoops that are either standard or would not leave any trace.

So : Are there any specialized 'smelt master' burials? Were ALL the large metal tools re-cycled? Is there some social reason why smelting tools were treated differently than blacksmithing tools? (Conversations with Dr. Kevin Smith suggest that this may be the case ?)
- There are no specific clothing items that have been found that relate to the very real protection problems quite specific to iron smelting
So : I'm going to put that into another post!
Darrell
A reference:
www.warehamforge.ca/ROMiron
Monday, June 11, 2007
'Hot Swap' Double Smelt
As Neil has the actual smelt records, this report is only approximate. Please excuse me if I get any of the team members wrong - there was a LOT going on!
At the beginning of the experiment, a number of things were noted that were expected to effect the progress of the two overlapping smelts:
1) The smelter structure had slumped forward slightly off vertical. This was largely due to the effect of damp conditions over the spring, softening the raw clay cobb that remained at the base of the structure. (From tuyere level up the clay had been converted to a rough ceramic by the three earlier firings.) It was also possible that the effect of frost heave on the half banked side of the smelter also contributed. The slight lean of the furnace towards the tap arch was not expected to have a significant effect on the progress of the smelts. The angle of the tuyere, which had remained in place after the two November firings, was a matter of concern. The angle had shifted from the ideal 22.5 degrees down to closer to 15 degrees down. In past experiments, a shallow tuyere angle has resulted in the slag bowl forming higher in the furnace, with more potential to quickly fill with slag and drown the tuyere. A smaller bloom is expected from a furnace with a shallow tuyere angle as well.
2) Most importantly, the rock iron ore was suspected to have a higher content of waste stone, and suspected also of being lower in iron oxide content as well. The rock ore remaining on hand was gathered by Darrell and Vandy from the secondary mine source discovered by Sauder and Williams. Although a day had been spent at the mine with the Lexington crew gathering ore, the material on hand had been gathered (and backpacked down off the mountain) by Darrell and Vandy working alone (and undirected) the following day. (Earlier Virginia Rock Ore used had been much better quality material gathered by Lee and Skip from their primary source.) When working without supervision, there had been a specific attempt made to gather ore with various differing physical appearance from a number of different locations within the overall deposit. This in the hope that the quality would average out in the end. During the crushing phase it was obvious that there was much more plain stone included inside the pieces gathered than had been present in past material.
The combination of these two factors suggested that the smelter would not only produce more glassy waste slag than had been the case in the past. Also it was expected that would also need more frequent tapping off of that same slag to prevent drowning of the tuyere. Overall it was expected that there would me significantly less available iron oxide, resulting in a smaller bloom and a lower total yield.
Our fuel source was once again Royal Oak Charcoal, supplied by yet a fourth kind donation of material from the company. (DARC thanks Royal Oak for its kind support by way of 600 pounds of charcoal which made this and future experiments possible.) Sam gets credit for crushing the bulk of the charcoal required for the two smelts using his impressive double mallet technique.
The first smelt was undertaken by Neil and Dr. Ron Ross, with Darrell guiding and troubleshooting (avoiding most of the work). Once finished with charcoal, Sam stepped in as record keeper over both smelts.
As is typical, although our intention was to start pre-heat for 8 AM, getting equipment set up and everything organized always delays the start, so actually the fire was started closer to 9:30. The preheat phase was fairly standard, with the switch to graded charcoal marking the official start of the smelt after 60 minutes. Over the first smelt the furnace ran evenly and maintained a textbook burn rate of 8 minutes per standard 4 lb charcoal charge. A total of 20 kg of ore was added for the first smelt. The course of the smelt followed what has come to be the fairly standard method : heat the stack / seed charges / main charges slowly increasing in volume / allow the last charge to settle then add a larger shock charge / burn down for extraction. (For detailed sequence, Neil is expected to publish the field data soon on to the DARC web site at www.darkcompany.ca/iron ) As was expected with the high rock ore, more glassy slag was created than in our past smelts, and several tappings were undertaken.
Neil prepared and started a top extraction. It was quickly clear that there was an excessive amount of liquid slag at tuyere level, and he was having trouble locating the potential bloom. His pounding with the thumper was found to be just splashing into a large pool of liquid slag. Darrell quickly stepped in (working without much gear on and burning off a glove in the process) and located and loosened out the smaller than expected bloom mass. Neil then grabbed it out with tongs and quickly moved it over to the consolidation stump, were Ron / Sam / Gus were waiting with large hammers. The bloom proved to be quite spongy, but was quickly worked down to a rough block a bit larger than fist sized. The finished bloom weighs only 900 gm. It still contains considerable slag and is expected to loose a significant amount of weight as it is later further compacted in the forge into a bar. The metal appears to be of workable quality however, expected to produce a good soft iron.
As soon as Neil moved out of the smelt area, the second team of Dave / Ken / Kevin got into action - the 'hot swap'. First the remaining ignited charcoal scooped from smelt one was dumped back into the furnace, with the remainder of stack filled with fresh charcoal and the air blast resumed. Because of the retained heat in the furnace, only one or two charging cycles were required to fully ignite the working height of the smelter and return to the desired 8 minutes per standard bucket burn rate. Again the standard ore charging sequence of seed charges / increasing volume of primary charges was undertaken.
Because the small size of the initial bloom had confirmed in our minds the low iron oxide content of the ore, it was decided to enrich the second smelt by adding hematite blasting grit. That material is over 90 percent iron oxide, but can often cause problems because of its actual lack of silica for slag formation. It was decided that mixing 50 % of the rock ore with 50% of the hematite might create a more balanced mixture of iron available inside the furnace. The method this team chose to employ was to alternate rock ore with hematite scoop by scoop, As the hematite is a bit more dense than the rock ore, the end result was slightly more of the hematite making up the roughly 25 kg total ore utilized over smelt two.
A significant secondary problem arose during the second smelt. The initial patching of the furnace wall in the tuyere area before the firing had been done with 'Blue Mountain Red' - a local ground clay which has a relatively low firing temperature. Soon into the second smelt, it was obvious that the smelter wall above the tuyere, but within the supporting earthen bank, had burned through. Dramatic slumps of the ash and sand packing mix on the tuyere side of the smelter indicated large amounts of this material was falling into the furnace. By keeping a quantity of this mix handy, it was possible to fill in the developing hole. Over the course of the second smelt the better part of a 20 litre pail of packing mix was consumed in this way. Mixing ash and sand and then bringing it to the kind of heat existing in the interior of a smelter (1100 C or more) results in the creation of glass. Huge volumes of light glassy slag were being produced from this source alone. Add that to the slag still in place from the first smelt, plus any new slag being formed from the addition of high rock content ore and it was obvious that slag volume was going to present a major problem. The team had to undertake a number of fairly large slag taps to keep the tuyere clear. Eventually the large volumes of glass being created via the packing mix (going through what latter proved to be a fist sized hole) started to block of the tuyere.

Second team tapping slag
Although not quite ready to extract the bloom in terms of an ideal sequence, the relatively sudden restriction in air flow lead to the decision to pull the bloom. Because the smelter was not considered likely to be recoverable, it was suggested to make a bottom extraction through the tap arch. It proved difficult to pull out the bricks filling the tap arch, as repeated slag taps had created a large mass of solidified glass around them. Some close work with steel rod and hammer by Ken broke up and cleared the bricks and exposed the original base layer of charcoal fines and ash under the slag bowl. Kevin was then able to rake clear the bottom of the bowl. This was punctured, and hot liquid slag allowed to flow into the gap to soften the lower surface of the bowl. Next Dave was able to hammer clear some of the upper edges of the combined slag mass. Quickly moving to hook and pry at through the tap arch, the bloom popped free quite suddenly.
Again the bloom mass was moved over to the consolidation stump. With Dave / Ken / Sam on the hammers and Kevin holding, the loose mother was knocked clear and the ragged edges compacted. The bloom was returned to the smelter body for another heat to allow for a second compaction. The end result was a rough cube of metal with a total weight of about 3100 gms. The second bloom is considerably more dense, more in line with what would be expected in a successful smelt.

The two blooms produced
Although the yields are considerably less than what we have come to expect, this is consistent with suspected low iron content of the ore used. The improved efficiency of a double smelt was clearly illustrated in terms of both reduced time and lower overall charcoal consumption. Some further experimentation remains on designing a more durable smelter, but it is important to remember that the furnace used was undertaking its fourth and fifth repeat firing at this point with only minimal repairs. Overall the teams were able to predict and respond effectively to problems that arose over the course of each smelt event. There is no doubt that the overall confidence and ease of action of individual participants improved significantly over this experiment.
(Sunday's activities with Dr. Ross will be detailed in a separate post)
At the beginning of the experiment, a number of things were noted that were expected to effect the progress of the two overlapping smelts:
1) The smelter structure had slumped forward slightly off vertical. This was largely due to the effect of damp conditions over the spring, softening the raw clay cobb that remained at the base of the structure. (From tuyere level up the clay had been converted to a rough ceramic by the three earlier firings.) It was also possible that the effect of frost heave on the half banked side of the smelter also contributed. The slight lean of the furnace towards the tap arch was not expected to have a significant effect on the progress of the smelts. The angle of the tuyere, which had remained in place after the two November firings, was a matter of concern. The angle had shifted from the ideal 22.5 degrees down to closer to 15 degrees down. In past experiments, a shallow tuyere angle has resulted in the slag bowl forming higher in the furnace, with more potential to quickly fill with slag and drown the tuyere. A smaller bloom is expected from a furnace with a shallow tuyere angle as well.
2) Most importantly, the rock iron ore was suspected to have a higher content of waste stone, and suspected also of being lower in iron oxide content as well. The rock ore remaining on hand was gathered by Darrell and Vandy from the secondary mine source discovered by Sauder and Williams. Although a day had been spent at the mine with the Lexington crew gathering ore, the material on hand had been gathered (and backpacked down off the mountain) by Darrell and Vandy working alone (and undirected) the following day. (Earlier Virginia Rock Ore used had been much better quality material gathered by Lee and Skip from their primary source.) When working without supervision, there had been a specific attempt made to gather ore with various differing physical appearance from a number of different locations within the overall deposit. This in the hope that the quality would average out in the end. During the crushing phase it was obvious that there was much more plain stone included inside the pieces gathered than had been present in past material.
The combination of these two factors suggested that the smelter would not only produce more glassy waste slag than had been the case in the past. Also it was expected that would also need more frequent tapping off of that same slag to prevent drowning of the tuyere. Overall it was expected that there would me significantly less available iron oxide, resulting in a smaller bloom and a lower total yield.
Our fuel source was once again Royal Oak Charcoal, supplied by yet a fourth kind donation of material from the company. (DARC thanks Royal Oak for its kind support by way of 600 pounds of charcoal which made this and future experiments possible.) Sam gets credit for crushing the bulk of the charcoal required for the two smelts using his impressive double mallet technique.
The first smelt was undertaken by Neil and Dr. Ron Ross, with Darrell guiding and troubleshooting (avoiding most of the work). Once finished with charcoal, Sam stepped in as record keeper over both smelts.
As is typical, although our intention was to start pre-heat for 8 AM, getting equipment set up and everything organized always delays the start, so actually the fire was started closer to 9:30. The preheat phase was fairly standard, with the switch to graded charcoal marking the official start of the smelt after 60 minutes. Over the first smelt the furnace ran evenly and maintained a textbook burn rate of 8 minutes per standard 4 lb charcoal charge. A total of 20 kg of ore was added for the first smelt. The course of the smelt followed what has come to be the fairly standard method : heat the stack / seed charges / main charges slowly increasing in volume / allow the last charge to settle then add a larger shock charge / burn down for extraction. (For detailed sequence, Neil is expected to publish the field data soon on to the DARC web site at www.darkcompany.ca/iron ) As was expected with the high rock ore, more glassy slag was created than in our past smelts, and several tappings were undertaken.
Neil prepared and started a top extraction. It was quickly clear that there was an excessive amount of liquid slag at tuyere level, and he was having trouble locating the potential bloom. His pounding with the thumper was found to be just splashing into a large pool of liquid slag. Darrell quickly stepped in (working without much gear on and burning off a glove in the process) and located and loosened out the smaller than expected bloom mass. Neil then grabbed it out with tongs and quickly moved it over to the consolidation stump, were Ron / Sam / Gus were waiting with large hammers. The bloom proved to be quite spongy, but was quickly worked down to a rough block a bit larger than fist sized. The finished bloom weighs only 900 gm. It still contains considerable slag and is expected to loose a significant amount of weight as it is later further compacted in the forge into a bar. The metal appears to be of workable quality however, expected to produce a good soft iron.
As soon as Neil moved out of the smelt area, the second team of Dave / Ken / Kevin got into action - the 'hot swap'. First the remaining ignited charcoal scooped from smelt one was dumped back into the furnace, with the remainder of stack filled with fresh charcoal and the air blast resumed. Because of the retained heat in the furnace, only one or two charging cycles were required to fully ignite the working height of the smelter and return to the desired 8 minutes per standard bucket burn rate. Again the standard ore charging sequence of seed charges / increasing volume of primary charges was undertaken.
Because the small size of the initial bloom had confirmed in our minds the low iron oxide content of the ore, it was decided to enrich the second smelt by adding hematite blasting grit. That material is over 90 percent iron oxide, but can often cause problems because of its actual lack of silica for slag formation. It was decided that mixing 50 % of the rock ore with 50% of the hematite might create a more balanced mixture of iron available inside the furnace. The method this team chose to employ was to alternate rock ore with hematite scoop by scoop, As the hematite is a bit more dense than the rock ore, the end result was slightly more of the hematite making up the roughly 25 kg total ore utilized over smelt two.
A significant secondary problem arose during the second smelt. The initial patching of the furnace wall in the tuyere area before the firing had been done with 'Blue Mountain Red' - a local ground clay which has a relatively low firing temperature. Soon into the second smelt, it was obvious that the smelter wall above the tuyere, but within the supporting earthen bank, had burned through. Dramatic slumps of the ash and sand packing mix on the tuyere side of the smelter indicated large amounts of this material was falling into the furnace. By keeping a quantity of this mix handy, it was possible to fill in the developing hole. Over the course of the second smelt the better part of a 20 litre pail of packing mix was consumed in this way. Mixing ash and sand and then bringing it to the kind of heat existing in the interior of a smelter (1100 C or more) results in the creation of glass. Huge volumes of light glassy slag were being produced from this source alone. Add that to the slag still in place from the first smelt, plus any new slag being formed from the addition of high rock content ore and it was obvious that slag volume was going to present a major problem. The team had to undertake a number of fairly large slag taps to keep the tuyere clear. Eventually the large volumes of glass being created via the packing mix (going through what latter proved to be a fist sized hole) started to block of the tuyere.

Although not quite ready to extract the bloom in terms of an ideal sequence, the relatively sudden restriction in air flow lead to the decision to pull the bloom. Because the smelter was not considered likely to be recoverable, it was suggested to make a bottom extraction through the tap arch. It proved difficult to pull out the bricks filling the tap arch, as repeated slag taps had created a large mass of solidified glass around them. Some close work with steel rod and hammer by Ken broke up and cleared the bricks and exposed the original base layer of charcoal fines and ash under the slag bowl. Kevin was then able to rake clear the bottom of the bowl. This was punctured, and hot liquid slag allowed to flow into the gap to soften the lower surface of the bowl. Next Dave was able to hammer clear some of the upper edges of the combined slag mass. Quickly moving to hook and pry at through the tap arch, the bloom popped free quite suddenly.
Again the bloom mass was moved over to the consolidation stump. With Dave / Ken / Sam on the hammers and Kevin holding, the loose mother was knocked clear and the ragged edges compacted. The bloom was returned to the smelter body for another heat to allow for a second compaction. The end result was a rough cube of metal with a total weight of about 3100 gms. The second bloom is considerably more dense, more in line with what would be expected in a successful smelt.

Although the yields are considerably less than what we have come to expect, this is consistent with suspected low iron content of the ore used. The improved efficiency of a double smelt was clearly illustrated in terms of both reduced time and lower overall charcoal consumption. Some further experimentation remains on designing a more durable smelter, but it is important to remember that the furnace used was undertaking its fourth and fifth repeat firing at this point with only minimal repairs. Overall the teams were able to predict and respond effectively to problems that arose over the course of each smelt event. There is no doubt that the overall confidence and ease of action of individual participants improved significantly over this experiment.
(Sunday's activities with Dr. Ross will be detailed in a separate post)
Tuesday, June 05, 2007
Iron Smelt Course Results...
This is just a fast overview of the Introduction to Iron Smelting course held at the Wareham Forge over June 1 - 3, 2007.
The participants for this program were Colin Paddon of Grassie ON, and Stephen Midkiff of Elmira PA.
On Friday evening there was a quick run through of the basic process to be undertaken with the construction of an Econo Norse style furnace. We finished this up just as we were loosing our working light. The evening was completed with a discussion of the background theory of iron smelting and an examination of alternate ores and smelter constructions.
Saturday was a long working day. For this smelt, commercial hematite blasting grit was used as the ore. Charcoal had been purchased pre-sized and screened. After finishing smelter set up (tuyere and base) the usual split wood pre-heat was started. Students then prepared a small amount of rock ore and standard charcoal to size to learn those processes.
Working in roughly 30 degree C heat, the furnace was run through the normal sequence of pre-heat, raising to operating temperature and charging with ore. The furnace preformed extremely well, maintaining an even average burn rate of 4 lbs charcoal each 8 minutes (ranged from 7 to 9 per bucket). An even ore charge rate of 3 1/2 lbs per bucket / 8 minutes was smoothly established. In total 49 lbs of the hematite ore was charged. The lack of slag available from this pure iron oxide was balanced nicely by the slight inflow of the sand / ash packing that results from the loose brick construction of the Econo Norse smelter. The smelter ran very consistantly, with only a single slag tap being required, late in the sequence, to keep the tuyere clear.

The burn down phase was started at roughly 3 1/2 hours, with a 2 lb shock charge added. A first attempt at extraction was made via the tap arch and removal of the front plinth block. Little liquid slag was observed, and the bottom of the slag bowl was firm and completely filled the smelter interior. Although several strikes were made on to the top of the bloom / slag bowl, it was not possible to free the mass from the smelter. The sheet metal containment was then cut with the intent to disassemble the smelter from the top down. Unexpectedly, the whole loose brick structure collapsed, freeing the large mass of slag encased bloom. In a mad scramble, the mass was grabbed and moved over on to the wood stump. Surprisingly little loose 'mother' was hammered off. The resulting bloom proved quite dense and well compacted. A cut was started to section the bloom into two pieces, but by the time it had been worked down half way we were all pretty much exhausted and too much heat had been lost.
Racing the bloom back to the workshop, a couple of alternative cutting methods were tried on the still dull red mass. In the end a cutting torch was used to finish off the last 1/3 at the bottom of the cut. When the pieces were put on the scale, the finished bloom weighed in at a remarkable 28 lbs! This result is a 60% return from the ore, certainly the highest yield I personally have seen to date. Judging from the sparks produced with a hand grinder, the carbon content would appear to be in the middle range (like a spring steel).

(this is one of the cut half pieces)
Stephen was able to spend the following day in the forge compacting his half of the bloom. His starting mass was roughly 8 inches long by 4 thick and 4 wide at a total of 14 lbs. This block just barely fit into my gas forge to allow an even pre-heat to a middle orange. The piece was then placed in the coal forge to finish bringing it up to a low yellow working temperature. Again the small air hammer on hand (only 50 lbs) could just manage to choke in that 4 inch size. Although it was extremely slow going, over several hours Stephen was able to compact the starting bloom down to reasonably solid starting bar.

I am extremely pleased with the results produced by Colin and Stephen. This despite the quite punishing working temperatures on smelt day. Although they did have my guidance, the two of them undertook all of the work involved in the smelt. Afterwards I did warn them that good luck was certainly a factor for such an extremely successful first smelt!

(after the conversion to a rough bar - finished weight 11 lbs)
Subscribe to:
Posts (Atom)


