Wednesday, September 28, 2016

TtT2 - Considerations towards an object (2)

Second Flow Chart from Turf to Tools Two
Chart One


This is a continuation of an earlier post on the same topic. This flow would lead off the lower right corner of chart one.

Critical (for me) is that all those elements / conciderations are coming first. You might notice that the small space in black type in the lower left is where the actual object under creation actually starts to be considered in detail.

My work here on TtT2 got jammed at the block to the upper right 'Gap here at Bloom to Bar'.
In the end the one day allotted for 'forge prep' (day 5 / Sept 20) actually turned into a total of three full days spent. We ended up having severe problems with fuel, to the point were yet another half day of equipment modification (actually undertaken by Eden) and ideally another half day of physical testing (needed - general forge work by me) is required before I would want to risk working up any of our valuable bloom iron.  The problem of a workable forge welding flux still has not been solved in addition.

For those counting, by this point I am now 'officially' into the two week period for 'personal project' as covered by my OAC Project Grant.

(Hey Nuno! Does this mean I have to come back to Scotland and SSW for a third working session??)

Iron Smelt in Poland (two)

This posting a bit out of current order, coming from the iron smelting event at the Museum of Ancient Mazovian Metallurgy, Pruszkow Poland, Sept 7 - 12, 2016.

Second Iron Smelt
Sunday Sept 11

I had hopes of re-using the upper portions of the furnace from the first smelt, which despite having been lifted off to expose the bloom, was still in fairly good condition.
Well...

I had told event organizer Kamilia Brodowska that for the second smelt, I would be happy to work with a group of three younger volunteers who where keen to take part.
Ok, 14 years old, semi keen, proved not used to actual hard work, but all in all they did stick it out for two days and eventually sorted out into tasks that suited their abilities and interests.
Early on build day (Saturday), while starting to mix clay, one of the lads tripped up (somehow) and fell on the existing furnace.
Guess what boys? This means you get to experience mixing even * more * clay, then building an  entire  new furnace!

Furnace 2 - during pre-heat Sunday morning.
I decided to build this furnace raised on a plinth. In this case made of the raw clay brick that had been supplied in large amounts for the various builds.
Unlike the first furnace, this one was slightly tapered towards the top. With 22 cm internal diameter at the top and about 30 cm at the base.
It had a wider tap / extraction arch than number one, at 28 wide by 20 cm tall.
Typical height, at 54 cm above tuyere.
Again the copper tuyere, set 5 cm proud of the interior wall, roughly 20 degrees down.
Charcoal fines base set at about 15 cm below tuyere centre.
One of the boys on Charcoal
Ore used was the Harres from Denmark (thanks to Niessen & Olessen), total 41 kg.
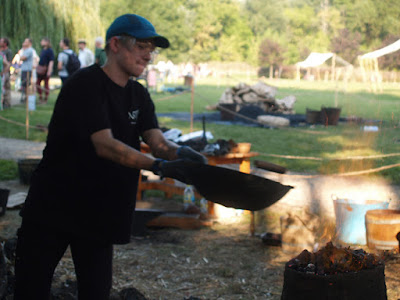
It took the two boys working Charcoal and Ore to get a co-ordinated addition system sorted out, but once they had it figured they did a very good job. (The third member proved very good at public interface, so he undertood explaining - in Polish - to the many people watching.)

I used a method that had been illustrated by Micheal Niessen, earlier during his first smelt.
Micheal makes his first charges not of ore, but of 2 - 4 kg of iron rich tap slag. He suggests that doing this will create the needed slag bowl at the bottom of the furnace much faster. This in turn means that metallic particles being reduced will start too collect sooner, with the end result of more effective bloom production. Both his direct experience and our use of this method at the workshop certainly prove this to be the case. 
Bloom from smelt two
The end result was an extremely nice 8.2 soft iron bloom.
This would prove one of the largest created, out of a total of some 15 + individual smelt attempts by the various teams.  Most certainly this bloom showed the single best return, with a yield of 20%.

 Again, on comparison with the Norse artifact bloom, you can see the shapping is almost identical.
(On a suggestion by Lee Sauder, we intentionally left the cut to about the same depth to illustrate this.)

Plans are to add this specific bloom to the Museum's display as a sample of what historic blooms would have looked like!

Great work by all.

Monday, September 26, 2016

TOCCA FERRO


 TOCCA FERRO
A collabrative project between :
Katriona Gillespie
Darrell Markewitz
Kelly Probyn-Smith

Initial concept Sept 21, 2016
First proof of concept test = Sept 25, 2016

details to come...

Friday, September 23, 2016

Scottish Coal - the Bad, the Ugly (where is the good?)


One of the tasks for the central week of Turf to Tools 2 was to get a basic equipment set up for basic blacksmithing operations at the Scottish Sculpture Workshop.

After way too much time expended attempting to source equipment, and manage excessive shipping costs, Eden Jolly at SSW ended up using measurements I supplied and simply casting a new forge fire pot. Cast Iron pours is one of the features of the facilities at SSW!
Eden's fire pot, set in place and ready for the fuel.
As it turned out, two critical elements remained to create an effective forge.

The first problem has proved providing suitable air flow. As built above, there is a choke point at the lower 'chip breaker'. This was fabricated out of scrap materials available around the workshop, forming the 'slotted cylinder' type seen above. Problem ended up being that the available air opening was effectively a rectangle about 1/2 wide by about 1 3/4 inch long. Too small to easily pass the required air for ideal combustion. After trying three separate blower / gate combinations, we did manage something that if a bit loud, would at least allow for a reasonable sized fire.

We used up the last bag of (more or less) acceptable coal on hand - remaining from the 2014 project.

Eden went to the local coal merchant.
He asked for blacksmithing coal
He was sold what they call 'Smithy Nuggets'.
The bags are actually labled 'Best Home Heating Coal'
What we got.
Sorry - this is Anthrocite - hard coal.
Not Bituminous or soft coal.
Hard coal is fine for steam engines or heating stoves. It is not the type of coal needed for small scale (ie normal) blacksmithing forges.
See the yellow crystals on the surfaces? That is sulpur.

This is what happens when you try to burn this quality fuel in the forge.
After about 10 minutes of a full air blast.
Eden still struggling after 20 minutes of blast.
This level of dense sulphur ladden smoke is toxic to the worker. I've already gotten lungs damaged from working with high sulphur coal at a museum in the late 1980's. By the point that the second photo was taken - I would not get any closer to that fire or smoke.

The sulphur also damages the metal itself, making forge welding particularly almost impossible. (Maybe more on that later.)
Since the next phase of Turf to Tools is to compress and repeatedly forge weld up the blooms into solid bars - I was not willing to subject our hard gained bloom iron to contact with this fuel.

We have hopes that we may be able to get some better quality (workable) coal from the near by Transport Museum in Alford.  (later today)

At this point the Bloom to Bar part of the project is three days behind. It will have to be laid aside to ensure all is ready for the second iron smelt experiment (fuelling with Peat) taking place TOMORROW.

Thursday, September 22, 2016

TtT2 - Considerations towards an object (1)

I have been attempting to place segments here into roughly the chronological order of the individual project events - to provide a record of the progress of each segment.
To be fair to myself, the lack of access in Europe (thanks for not much Google), has me now neck deep in the Turf to Tools 2 project at the Scottish Sculpture Workshop. Aspects of this work are currently dominating my thoughts.
So although it may mess up any standard documentation effort, today's offering is going to cover what is going on in my (over active) brain this day...

Right now I am wrestling with a number of underlaying concepts / world views generated by the Turf to Tools project.
Exploring material, resources and landscape, this Slow Prototype project looks at the processes, skills, and heritage of taking raw materials through to workable implements.
- The role of the 'Artisan Maker' as a middle ground between 'Fine Artist' and Technician.
- Explaining the merging of 'processes, skills, and heritage', and how the Arisan also may undertake an extensive 'conceptual' journey.
- Considering the relationship between the Environment and the Human, in terms of the impact of Human gathering of materials, conversion to object, use of object, through to discarding of object.

In conversation with a number of the other people undertaking their own 'residency' periods here at SSW, many state their objectives as 'conceptual art'. I hear a lot of stress on the * idea *, not the finished  * object * itself.
I honestly get uncomfortable around this. There is certainly an impression given that exploring a concept, often into long duration, and fine detail, is of itself more important than actually physically creating a tangible object. That 'manufacturing' process is often deemed to be the work of 'mere technicians' (implied if not directly stated). Effective communication of a concept to other viewers is often held as less important than the individual's personal exploration.

As you might guess (those of you who have followed me any length of time or viewed my past work via the Wareham Forge web site) - I don't follow this view point of 'high art' being somehow more refined / valuable / difficult than what is often delegated to 'craft'.

I'm realizing, partially through conversation with Director Nuno  Sacramento, that part of my intended role inside the Turf to Tools project is to provide an example of the 'Artisan Maker', and their role within a larger collaboration.

Here is an example of what I mean :

(click for a detailed view)
This is a 'concept flow chart' that applies directly to the stated objectives for the Turf to Tools project specifically. Many of the individual points themselves may have greatly expanded chains of concept / consideration sitting beyond what is shown here (!).

I think it becomes obvious that even framing the  * background * leading to the making an object can involve consideration of a huge number of concepts and factors, ranging from the theoretical to the practical. 

I will be undertaking a second step mapping this morning, which is the charting behind creation of a specific object. (Hope to detail that here soon!)


Tuesday, September 20, 2016

Some iron around Ypres


I don't want (at this point) to really comment about the vast destruction of Ypres during World War One. But I do want to put some of the iron work images contained here into some kind of context.

The following images relate the main market square in the centre of Ypres:
This is a 'before and after' WW1 - images roughly looking to the west. Note the pavillion.
This is an aerial view, facing roughly east. The arrows relate to the next image.
This is a large pannoramic view taken from the location of the original pavillion (seen in the first image) towards the arrows shown in the image just above. This image shot Sunday Sept 6, 2016.
The point of this introduction?
The town of Ypres was almost completely flattened by artillery bombardment from 1914 - 1918.
After the War, the returning population there chose to completely restore the central town exactly as it had been before the destruction. Most of this re-building took place in the early 1920's.

This has effected the iron work now seen around the city centre (inside the medieval defenses). There are occasionally pieces that had managed to survive the bombardment, picked out of the rubble and re-used. There are a great number of objects that are copies of the few 'artifacts'. There is also a good amount of replacement work, mostly dating to the post WW 1 period.

Wall brace - presumed 'orginal', on the Cathedral.
Many of the buildings in central Ypres have roughly similar forged pieces on the exterior. These typically run in a line that would mark the beams holding up second or upper floors. My best guess is that these serve as 'washers', the central staple (clearly seen here) being attached to the wood beams on the other side of the wall.  There are many on 'newer' buildings that are obviously just decorative.
Grill Pannel - Inside the Cathedral
Detail
Framing the 'new' alter in the Cathedral is a series of tall hand forged grills. These are 'new' (dating to the restoration in the 1920's). Many traditional forming and joinnery techniques are seen - hot punching  & spliting (with elements inserted) / rivets / collars / forge welding. This was an amazing piece of work.
Door grill pannel
There are a large number of both 'security' door grills and rails for small balconies. These range in complexity from simple (but often effective) scroll work to more elaborate forgings like the one seen here. (We noticed that although the original client had obviously asked for the initials D M to be included - the two oval shapes make the text read out DooM !) A piece that shows both forge and more modern torch or arc welding (certainly available by 1920's).
New and old work
This combination caught my eye.
What was likely originally a bell pull on the right was certainly hand forged, appeared to be actual wrought iron material. From its condition I would guess created well before the 1900's.
The quite elaborate door panels appear much more modern, certainly after the restoration effort. Perhaps even a contemporary work, created to match the lines found elsewhere around Ypres.


Monday, September 19, 2016

Iron Smelt in Poland (one)


I do need to write more about the iron smelting symposium in Pruszkow Poland - and how I got to be there.
The team working area on Friday.
Jens & Lee at the rear (Michael's furnace).
Tom central with his and Jens' furnace.
My furnace at the front.
For now, a short look at the two iron smelts I undertook there...

'Loki at Pruszkow'

About 3 1/2 hours into the smelt.
Norse Short Shaft furnace :
70 cm total height = 20 cm base depth / 50 cm stack height
28 cm interior diameter, cylindrical
Copper tuyere : insert 5 cm, angle about 20 degrees
Air from Danish 'standard vaccum' set about 2/3 volume (??)
Ore 'Goldere' and 'Harres' from Denmark, total 30 kg
Charcoal type unknown, total 46 kg +
Total Time : main sequence about 5 hours to extraction

Remains of the broken furnace after the smelt. (Snorri looks on)

An attempt was made to undertake a top extraction. It did not prove possible to find an edge of the encased bloom.
At that point a normal bottom extraction was undertaken. During the smelt however, there had been very little slag removal via tapping. For that reason there was a very large slag block filling the entire base of the furnace.
In the end it proved necessary to simply break off the top shaft, basically at the top edge of the tap arch. This then exposed the entire slag bowl, and it was possible to grab the bloom.
'Loki' bloom, partially compressed.
Total Bloom Weight = 5.80 kg
Yield = 19 %
side view of the interior cut section

For comparison, look at this Viking Age artifact bloom (one of very few recovered).
There are a number of similar features.

Smelter Porn


'nuff said?

Sunday, September 18, 2016

"Two Brothers' - Completed


This is the 'Two Brothers' Panel by Shonna Johnson / Ypres 2016 Team 
www.ypres2016.com/design/masters-panel-designs/#19
The original panel design as submitted.

The Finnegan Brothers, Thoughts of Home
My Granddad, Jimmy Finnegan volunteered in 1914 when he was 17 years old leaving his blacksmithing apprenticeship to join the Royal Irish Rifles. While serving on the front line, as a sniper, he got word that his brother, Jonny Finnegan, was billeted nearby. The two brothers managed to send messages to each other and arranged a time and place to meet on the reserve line. Both borrowed bicycles and remarkably meet up and spent a short precious time together before returning to their regiments and the job of war. The brothers would not meet again until several years later, at the end of the war, home in their beloved Edinburgh. Jonny returning from fighting on the front line & Jimmy liberated from a German prisoner of war camp.
I wanted to capture the essence of the brothers rendezvous, caught between the harsh reality of the war, death, despair and the ravaged landscape and their thoughts and chat of cherished family and friends many miles away back home in Edinburgh. The stunted trees represent the war torn landscape with the brothers greeting each other towards the centre of the panel and memories of home symbolized by crow-stepped gabled houses and the tall tenement buildings of Edinburgh, home to the Finnegan family.
As completed at Ypres 2016
Central Figures - made before the event.
Left hand (some of the elements I helped with)
Right hand - 'Edinburgh'
Against the central 'Field of Poppies' - some idea of how the installed panel may look...

Friday, September 16, 2016

Working at Ypres 2016


As you have seen, the first part of the three nation Europe 16 trip was attending the Ypres 2016 event.

Overall view of one of two main forging areas (seen day 1). (Darrell's image)
The working area was under a large tent, divided into two main bays with shipping containers containing welders and power tools between them. The image above shows the area I would end up working in (to the left rear). The larger bay was divided into four individual group stations, with power hammers running down the central aisle. You can see the single (!) drill press that was available for all to use - a serious choke point for the assembly process for everyone.

One of the coke fueled forges. (Darrell's image)
Each working team was provided with at least two anvils of random quality and size (although most were very large sizes).
Each team station was equipped with three coke fired forges. These had extremely shallow rectangular fire pots, set up with drilled holes in the bottom for the air blast. This appears to be the standard here in Europe, rather than the deeper fire boxes with rotating chip breakers we are used to in North America.  I was told this was the type best suited to metallurgical coke - rather than the soft coal typical back home.
But honestly? That coke used was horrible! You can see the massive quantity of clinker I have just pulled out to the bottom right of the image. That mass was generated after about 20 minutes working time  - and about filled the shallow fire pot. Coupled with the  roughly 3 inch / 7 cm working depth of the fire pot, it proved difficult to effectively control and efficiently heat the larger stock sizes most of the designs called for.

I was (randomly) assigned to the team working under Scottish artist-blacksmith Shonna Johnson. The two day working period to produce her panel design was Sept 3 & 4.

(L-R) Davy, Shonna, Tilles, Michelle, *, Darrell (Pete missing)
The team was composed of Shonna and Pete, plus five others from the general pool of attending (working) blacksmiths. Our group was composed primarily of people from Belgium.
Michelle had excellent English, and worked together with Tilles, who had basically none.
Davy's English was also extremely good, and he worked with the other younger smith * (who's name I never did catch!). These two were both attending college level programs for artistic blacksmithing.
This left me, so I mainly worked with either Shonna or Pete, depending on what needed to be undertaken.
Working on the smaller air hammer
One of the tasks I undertook was drawing out the tapers for what would eventually become the tree shapes to the left of the completed design.
There were four air hammers in the working area. One of these (the largest) was pretty much constantly out of commission. At one point or another I would end up working with all three of the others. The hammer seen above was the smallest, but it was set up with a very aggressive top die for drawing out. I also found it a lot twitchy to use - it seemed to go from no motion to hitting quite hard very easily. (Mind you, by the time I was on my third piece, I was starting to get the hang of it.)

(You may notice that I kept my much loved personal forging hammer tucked into the back of my apron!)

Elements close to completion - getting ready for assembly on day 2.
Drilling holes for rivets - Pete looking like he is correcting my tool use!
Next up - The 'Brothers' panel completed... 

Images by Kelly Probyn-Smith


Tuesday, September 13, 2016

" I'M BACK..."


Now at the Scottish Sculpture Workshop!

I had intended to make regular blog posts for the first two of the five 'elements' of the overall trip.
Problem was that I could not access Google from either Belgium (in Dutch) or Poland (in Polish). 
At least it required a cell phone number 'to send a confirmation text message'. At least that is what it appeared to be telling me. And of course I don't have a European cell phone. 

Striking under the direction of Pete Hill
Now that I have made Scotland, I will be trying to work back to document not only the next four weeks at SSW (Turf to Tools Two / bronze casting) but also Ypres 2016 and the Polish Iron Smelting symposium...
 

February 15 - May 15, 2012 : Supported by a Crafts Projects - Creation and Development Grant

COPYRIGHT NOTICE - All posted text and images @ Darrell Markewitz.
No duplication, in whole or in part, is permitted without the author's expressed written permission.
For a detailed copyright statement : go HERE