Tuesday, September 22, 2015

Aristotle Furnace Demo - at Quad State

 This coming weekend holds the annual Quad State Roundup blacksmithing event held at Troy Ohio by the Southern Ohio Forge & Anvil group.

http://www.sofablacksmiths.org/
 I have attended Quad State as a participant for a good number of years now (since the early 1990's). I was one of the featured demonstrators in 2008 (iron smelt - overview).
The event has grown to one of the largest regional blacksmithing conferences, attracting 800 + people. In the past the core demonstrations have centred on four primary areas : traditional joinery/ forging : bladesmithing : contemporary via air hammer : non ferrous metalworking. In recent years the range and number of demonstrators has expanded greatly. One of the features of these demonstrations is that most typically individuals are chosen for their ability to *communicate* - as well as displaying good skills and wide variations in approaches to forge work. The 'tailgate' sales area has become nothing short of massive, making Quad State an excellent place to pick up everything from small sundries, hand tools, raw materials to large equipment like machines. All this for an extremely low entry fee (US - $55 pre-registered, camp on site for $10 per night).
I strongly recommend Quad State to anyone interested in forged metalworking.

This year, the organizers have shifted from a smaller number of featured demonstrators to include a larger number of smaller scale demonstrations :

One of the things we are trying to do this year is to give as many of the schools that include blacksmithing in their curriculum, the opportunity to do a demonstration during Quadstate 2015. Our thought is to have each institution do a full three-hour demo that will be geared to show what was typically covered in a cource at their institution. It could be done by their "resident smith" or someone that they may be using as an instructor. We see this as a chance for these schools to advertise and promote their programs as well as a chance for all attendees to see a broad range of demonstrators that would otherwise not available at many of the smaller conferences.
I'm happy to say that I have been selected to present one of those demonstrations:

Demonstration Description:

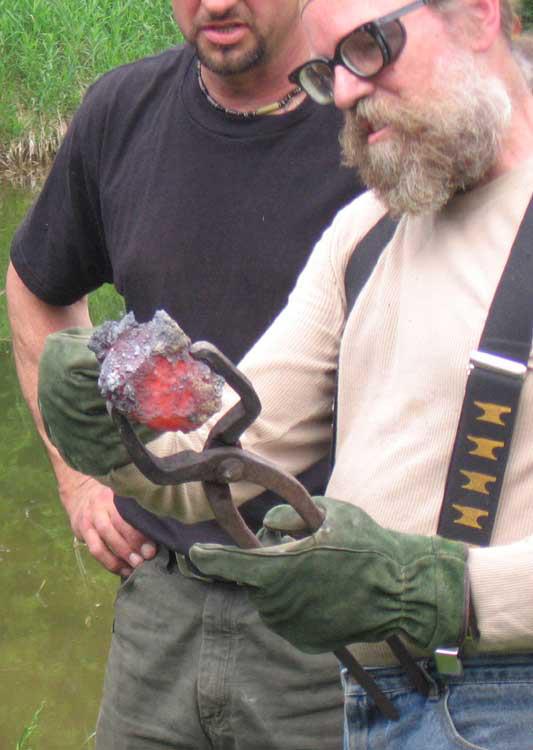
The Aristotle Re-melting Furnace.

The Aristotle is a small (table top) furnace which provides an alternative to larger scale bloomery iron smelters. Using roughly 5 lbs of charcoal, in 30 - 35 minutes it can convert *any* iron based material into a roughly 1 lb 'puck' of unique material. The resulting puck has the physical structure and texture of ancient bloomery iron. Importantly, but controlling the base structure of the furnace, the resulting carbon content of the metal can be modified.
This makes the easy to build and operate Aristotle Furnace the ideal method for those wishing to investigate the properties of bloomery iron - in a size easy for standard forging methods. The ability to vary the carbon content (either increasing or decreasing) is of special interest to the bladesmith.
Darrell Markewitz was part of the 'Smeltfest' team which originally developed this furnace. He will explain the working principles and construction of the furnace. Then he will demonstrate several operation cycles, including forging one of the produced pucks down into a working bar.


School / Workshop description:

Blacksmithing and Specialized workshop programs at the Wareham Forge

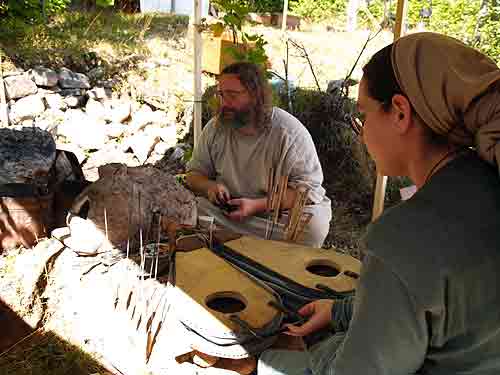
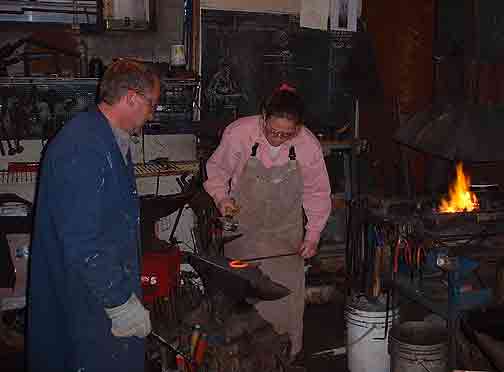
Since 1992, Darrell Markewitz has been offering weekend to week long training sessions, primarily from his home shop located about 2 hours drive NW of Toronto in Ontario. Classes are small, limited to four students, each with their own full anvil / tool set, with both coal and propane fired forges used for general blacksmithing programs. Currently there is one basic level (2nd weekend) and one specialized course ( 4th weekend) offered each month. As well as more standard blacksmithing workshops (such as Basic Bladesmithing, Forge Welding Tools, Introduction to Layered Steels) there are a number of historic metalworking programs (Bloomery Iron Smelting, Aristotle Furnace, Viking Age Forgework). Private sessions, either for individual instruction or project related, can also be provided.
see : http://www.warehamforge.ca/TRAINING/train.html
Darrell is also available as a demonstrator or workshop leader at your location, be it museum, college or blacksmith's group.
see : http://www.warehamforge.ca/school.html


Personal Description:

Darrell Markewitz first picked up the smith's hammer while a student at Ontario College of Art in the late 1970's. His keen interest in history continued as his forging skills developed, he was the blacksmith / interpreter at Black Creek Pioneer Village in Toronto during the 1980's. In 1992 he started full time as an independent artisan as 'the Wareham Forge'. For over 20 years this work has been multifaceted, with architectural projects, custom bladesmithing, and individual objects all showing a stress on design and hand forging. A significant additional area has been work on museum projects based on the Viking Age. This has included interpretive program design (Parks Canada), stand alone exhibit creation (Cranbrooke Institute of Science), and work on major exhibits (Smithsonian, Newfoundland Museum). In 2001, he started research into bloomery iron smelting, becoming a core member of the 'Early Iron' group with Lee Sauder. He continues to undertake an extensive series of experimental archaeology projects related to Northern European iron smelting and other fire based physical techniques. He has published a number of DVDs related to blacksmithing and historic methods, as well as journal articles and delivering academic papers. He has demonstrated and lead workshops at blacksmithing events, universities and museums in Canada, the USA and in Europe.

web site : http://www.warehamforge.ca
iron smelting : http//www.warehamforge.ca/ironsmelting
blog : http://warehamforgeblog.blogspot.ca


Thursday, September 17, 2015

Forge Blowers for Sale

As part of the ongoing structural repairs and general clean up at the Wareham Forge, I will be selling some of the extras of equipment I have stock piled over the last two decades.

First up - two forge blowers:


One is a 'Champion - No 1/2'
This blower is mounted on a wood base with an attached electric motor.
The unit is excellent working condition (if a bit noisy in operation). The drive motor has a standard electrical plug attached.
Price $100


Second is a 'Champion - 400'
This blower is in very good working condition (don't let the minor surface rust fool you).
It has the original three legged stand.
Price $150

Both have been stored inside at the Wareham Forge since I purchased them.
Either would be ideal for setting up a home forge set up.

Prices quoted are Canadian Dollars.
Payment via major credit card / paypal / cash at Wareham. (contact me)
A deposit will be required to hold either unit for purchase.
Units to be picked up at the Wareham Forge.


Tuesday, September 15, 2015

DARC at ICMS?

Have you been doing Experimental Archaeology?

DARC (the Dark Ages Re-creation Company) is hosting a session at (the International Congress for Medieval Studies ) Kalamazoo in May where we are looking to have people speak about their recent experimental archaeological work.

Expect some details forthcoming over on the DARC blog


If you are interested in speaking please reach out to me - I'm happy to talk over what is involved, the expectations and so on.

Session Chair / Organizer is Neil Peterson (e-mail)


modified from an original posting by Neil
Refining the Bloom - 2013 ICMS demonstration (image by Michigan Live )
As many readers are likely aware, both Neil and I have been presenting papers related to applied experimental archaeology at the International Congress for Medieval Studies at Kalamazoo for the last several years. This has included several (well received) physical demonstrations, themselves a further departure from the typical ICMS focus on manuscripts. This will be the second year that DARC has directly sponsored an individual session.

DARC is calling on serious independent researchers to present their ongoing work as part of the session : 
Archaeology & Experiment: Moving beyond the artifacts
Session Type: Papers
Archaeological sessions tend to focus on presentation of results from
excavations or preliminary analysis. Experimental archaeology moves
beyond the artifacts, allowing researchers to examine the underlying
question of "how" related to artifact finds. Ideally, experiments can
provide a preliminary answer to the question "Does this theory of how it
was done actually work". A keystone of experimental archaeology (and a
differentiator from reenactment/recreation) is that it follows the
scientific method of question, setup, and result - whether that result
is positive or negative. Presentations in this session will be expected
to review all three key elements in the discussion of their paper.
Papers submitted for these sessions would be good candidates for
publication in the EXARC Journal.
• Although DARC itself is focused on the Viking Age, presentations into any experimental archaeology project centred on roughly 450 - 1650 AD, ideally within Europe, is welcome.

• Remember that you need not actually write / submit a document. (Although DARC would love to have some, and these could easily be published on the 'Articles' part of the DARC web site.)  
• Many Re-enactors who are enguaged in serious long term experimental archaeology research happen to also have extensive experience communicating before the public! Often years of careful background study and practical trials remains hidden, despite the massive effort it often entails. Our individual strengths are as *presenters* and in the past Neil and I have found our presentations well attended and received - based on our long experience working a crowd.
• Individual presentations are limited to roughly 20 minutes (with time for introductions and follow up questions). Ideally one session would include three presentations.
• The submission deadline is September 30.


I can imagine the travel distance and related costs might pose more of a limitation to participation for many reading this (Kalamazoo is in mid Michigan, west of Detroit). As DARC is at best a loose collective of individuals, I'm afraid there is no institutional support for expenses that can be offered to participants.
 

Tuesday, September 08, 2015

Considering Ash in Bead Furnaces

This is a cross post from the DARC blog ...


One of the recurring problems the DARC bead making team has experienced is ash scars on the beads we make with various Viking Age type bead furnaces.

If readers are not familiar, you should spend a bit of time over on the main DARC web site - the area detailing our ongoing experimentation into Norse glass bead production :

http://www.darkcompany.ca/beads/index.php

It should be noted that Neil Peterson is the primary lead on this experimental archaeology project. (I only contribute as the 'fire guy', primarily on furnace design, with at least a basic level of skill with glass bead making itself)

As a (very!) brief overview :
• Plentiful archaeological remains at several Viking Age trade centre / town sites show that the Norse certainly made glass beads.
• 'Waste' remains do hint at some of the possible methods used to make individual beads.
• Raw glass itself does seem to be an imported material.
However :
Artifact remains are almost entirely limited to completed beads (graves) or waste products.
• There are only a very few actual glass bead making * tools * that have been recovered.
• There are no compete bead making furnaces. All that have been found are a very few clay 'bases' - that may (or may not!) suggest possible furnace dimensions.
All this, as practical workers, leaves us with a huge number of unanswered questions. (Summary of 'Questions & Answers' by Neil )

The experimental series has mainly concentrated on a couple of primary concerns:
• How do you build and operate a small charcoal fired furnace that allows you to effectively make beads similar to the ones known from the Viking Age?
• What is the superstructure for that kind of furnace - as defined by the remaining 'base plates'?

I have commented before concerning possible *effective* furnace design. (Admittedly, these based on my understanding of iron smelting furnaces and charcoal blacksmith forges.) :

Wednesday, October 10, 2012


"Bottle" Bead Furnace

*******************

The following is taken from an ongoing conversation Neil and I have been having about furnace design with an eye to reducing ash scarring. (As further background, Neil is proposing a series of tests that will produced measurable records of ash loading in the working area of the furnace.)

On 31/08/15 2:26 PM, Neil Peterson wrote:
... In passing on Sat you mentioned that chimney shape shouldn't impact ash.

Would you care to elaborate?  Feel free to suggest chimney ideas you think I should look into for this cycle.
You asked - much of this may be obvious to you

the ash produced ?
A given volume / mass of charcoal will produce a fixed amount of ash.
This will be a variable related I suspect most directly to wood type.
It may be effected by available air supply. (ie complete vs incomplete combustion)
It may be effected by actual temperature inside the furnace.

Wiki gives : "Typically between 0.43 and 1.82 percent of the mass of burned wood (dry basis ) results in ash " (this is talking about *wood* - not charcoal however). Likely this exact number can be researched (or close enough).
Given that in our case the wood type is not highly variable (usually oak or maple, standard sources).
The volume of the furnace is fixed (although changes between builds)
We are attempting to maximize temperature - kind of. Here we are balancing between duration and a fixed high temperature. To date we have been adjusting air volume to create what we consider an optimal temperature - of the exhaust gas (not necessarily the core burning temperatures, which I am not sure have been measured?)

So - we have an element to consider, which is particles over time.
1 kg charcoal yields 10 gm of ash (WAG) / complete burn time
Divide that by limited time that it takes to make a bead.

More important here is 'lofting' - how much ash is lifted into the expelled gases.
Generally we should have air input = gas output. (Scientifically there is some waggle here, based on relative volume of the elements in air against elements in the hot gas. I would think that not significant!)
Not *all* the ash produced is lofted. Much is trapped inside the remaining pile of charcoal inside the furnace.
This is especially true if there is a volume of 'non reacting' charcoal above the burning zone. This will be acting somewhat as a filter to trap particles.
Honestly, I think this is likely the major consideration. Bench test - compare ash visible in exhaust between start and end of a load cycle. Comparison test - how much ash is expelled from a smelting furnace (with about 40 cm of charcoal 'filter' above the combustion area)
Design implication? Build furnaces with a larger 'reaction area' - basically increase the bottom chamber height. (I did notice most of the builds others did on Saturday were very low furnaces - I expect these will have short effective working cycles, need more frequent loading, result in more ash in the exhaust.)

The other possible effect would be ash expelled from the reaction area, but because of height of the chimney below the working area for bead making, ash can settle back down into the chamber.
The core idea here is possibly increasing the chimney height.
I'm not so sure about this, as the ash particles are extremely light - and the air flow input is likely more than enough pressure / volume to still lift those a long way.
Increasing the distance or the complexity of the pathway of exhaust gas on its way out of the furnace may present a solution. The core problem here is doing this without loosing so much heat that the exhaust temperature drops below our needs.

The simplest way to construct a 'long chimney' would be with a tall, cylindrical furnace.
Primary problem is heat loss. There is the surface area (radiation loss) over internal volume ratio problem.
You might also use an internal set of baffels. This would in effect create an upper chamber with the
baffels above a lower chamber which in effect becomes a fire box. The upper chamber would suffer less heat loss - especially since one surface would be directly above the burning charcoal.
Primary problem here is complexity of construction.

Standard Bellows - actually based on that for Blacksmith's Forge.

In either case, one other consideration might be the air source. I'm not sure we are getting the correct balance between force and volume. Again our historic use is via a blacksmith's (speculative) equipment. I have certainly noticed massive variations in force and regularity of stroke between users. I think this is significant in terms of ash movement. What you desire is a slow, extremely even blow of constant pressure. It may be that a bag as a kind of regulator might be indicated.

It also would be valuable to have measurements 'in line' for air volume and pressure.
I would also suggest that input air from mechanical sources be controlled via an electrical controller (light dimmer) or a sliding gate of some. Both with markings at least relative - and repeatable.

What I meant about  'chimney shape not mattering' was an oversimplification and  short form. I think the elements given above are much more significant. There are theoretical considerations on shape (round / square) that likely do not come into play on this scale.
To my understanding, in large scale buildings, this is more to do with construction abilities than effects.
There is the 'passive draw' effect - which is a function of height, and does not apply here (scale again).
There will be some 'settling effect' - ash falling down after a certain distance. I think this also relates to reduced temperature due to cooling effects of the stack walls. Certainly NOT what we want here.
There is a 'lofting' effect - basically a tall stack distributes the same ash over a wider fall area (so reducing the individual point by point impact). Again not our concern.

We are more concerned with heat concentration - maintaining  a specific temperature at the stack mouth. A much wider chimney opening would certainly reduce the amount of ash present at a specific point location inside that opening. It would also be spreading the available heat energy out - certainly not a desirable effect in this case.

Without guidance from archaeology, anything we do is so speculative anyway.

Monday, September 07, 2015

Lost (& Found!) Commentaries on BLACKSMITHING!

One problem with the internet is that is is subject to variations, modifications, take-overs and other random losses of published materials.
In preparing to  answer an e-mail query this morning, I ended up (spending several hours) replacing 'lost' materials I had written and published as much as decade earlier.

These are the descriptive commentaries now back available on the 'On Blacksmithing' area of the main Wareham Forge web site:
Defining the Artist Blacksmith

A commentary on Terminology and Tradition
Originally on the Ontario Artist Blacksmith Association web site.
"Will you take an Apprentice?"

A commentary on the reality of the single person studio
Originally Seen on my blog Hammered Out Bits
A Career as an Artist Blacksmith?

Considering a Life as an Artist
A short article originally published on the Squido web series .
Teens as Students?

Some wisdom on the physical demands - and hazards, of working in as a blacksmith.
Wrought Iron Work?

What it really is - and what it really means!
On Buying an Anvil
Some information on what to look for
From my original GeoCities blog

If readers are not familure - I highly recommend (and thank!) the Internet WayBack Machine :

http://archive.org/web/

Saturday, September 05, 2015

HEAVY work - just not PAID work

... if any reading were wondering why there has been a gap in postings lately?

Right now I am undertaking a major structural repair here at Wareham.

The original 'Wareham Church Shed' was converted from its original purpose (built late 1930's) into a residence from 1987 - 1989. I purchased the property in November of 1989. (At that point the residence interior was basically 'unfinished' - raw plywood floors and only primer on the drywall.)
View from SE corner - 2005.
For some reason that defies my understanding, the two main structural beams that span the interior of the workshop were being supported by lengths of rail tie - set directly on to the *bare earth*. These beams sit on top of the poured concrete walls, and basically help hold the roof up. This interior framing is made of hand hewn hardwood (hemlock I think) - timbers salvaged from a still older barn. As the residence conversion was new construction when it was done, and thus must have been inspected, I can not imagine how this ever passed a proper certification.

Since the workshop space is unheated, the ground freezes, expands, then shifts the base level of each of the eight upright supporting posts - every year. At this point some of the individual supports have effectively dropped as much as 8 - 10 inches *below* the timbers they are supposed to be supporting. I have been placing blocks and driving wedges in every spring in an attempt to at least keep those supports carrying some of the intended load.

Workshop interior - Winter 2015.
In the image above, you can see a heavy (8 x 8) wood block inserted on top of one of the vertical supports (look just right of the ladder, along the horizontal beam)

More importantly, the image above shows just *why* I have left this necessary (!) repair so long before attempting it. You are looking at 25 years of accumulated materials stacked up on the storage racks attached to those same support uprights. On this side are stored tent poles, tents & overheads, hardwoods, plus various extra forge equipment and other potential project pieces.

Clearing the shop floor for the work, then moving all that stuff out took almost a full week just on its own.
Shop floor and rack contents removed.
A day to clear away the existing shelving and flooring (rail ties & stone slabs). A day gathering the project materials. A final day replacing the existing supports with temporary ones and pulling the old ones out.

7 days later - with temporary supports in place.

The image above actually shows where the *new* supports are going to be placed. In the image I have greyed out the far left temporary support, which will be removed as the work is undertaken and completed. You can see the new right side is going to be placed directly under the upper support - and under the combined original timber and new 'sister' beam. (That mess is another story into itself!)
Next is hand digging holes for the concrete foundations - which should have been done in the first place during the 1980's construction. These need to be large and deep enough to contain the 14 inch diameter by three foot long metal cylindrical ducting I am using for a concrete form. Then each is filled with (by my estimate) about 500 + lbs of concrete mix. Then the new steel support pillar (which I will be custom cutting and fitting) is installed on the left side. On the right a wooden timber will be used.

So :
One day to dig the hole
Half day to set form, mix concrete, pour (small mixer, hand carry), then backfill around form.
(Concrete allowed to set for 48 hours)
While first concrete sets, repeat for second foundation.
Half day to construct steel post, set in place.
(An additional couple of hours at some point to set the second wooden beam support, remove temporaries)

Repeat that whole process for the second cross beam at the rear end of the workshop.

Figure out how to rig up a new set of storage shelves (figure a day's work is likely there).
Put everything *back* on to the new shelving.
Re-configure the interior workshop space - back into some version of a working floor plan.
(I did mention that I am using the dirt from the dug holes to fill in a 'vehicle work pit' I had installed 15 years back - and never used? An additional 1/2 day was spent clearing the concrete block framing of that. This leaves a roughly 4 x 6 x 2 foot deep pit to the rear centre of the workshop floor.)

I did mention that this is just *one half* of the required structural repair?

Oh - there is a deadline! I have a course to teach over September 11 - 13 weekend. Ideally all the structural parts need to be completed by then (at least in the front half of the workshop).
The space will need to be cleared, sorted and set up to allow two students to work in the front half of the space.

As you might guess, this all is physically exhausting. And taking up my entire working day (no 'paid' work possible)
So much for the 'carefree life of the artisan'


Believe it or not, I do have some material in rough shape for a posting related to Viking Age glass bead making furnaces - hope to get that up here over the next couple of days...
 

February 15 - May 15, 2012 : Supported by a Crafts Projects - Creation and Development Grant

COPYRIGHT NOTICE - All posted text and images @ Darrell Markewitz.
No duplication, in whole or in part, is permitted without the author's expressed written permission.
For a detailed copyright statement : go HERE