For a report on the Sunday smelt (the raw experimental data) you could go to :
www.warehamforge.ca/ironsmelting/1106data.html
I was pretty frustrated because the smelt on Sunday had not turned out. There were a couple of small lumps of iron - maybe a pound between the three. So Monday late morning I packed all the required gear out to the smelt area and ran another smelt.
This time I positioned the base using charcoal fines at the correct level - as we had learned and have been doing normally. (I feel THIS was the reason the Sunday smelt failed.) On Sunday we had used a 'natural' base of wood ash from the preheating plus settled charcoal - which proved way too porous. The slag as it forms obviously just runs through the charcoal and settles too low into the furnace - and too far away from the heat generated at the tuyere.
The height of the smelter was extended another 30 cm by the use of a sheet metal cylinder. The clay came to 60 cm above the tuyere. This extra height made a considerable improvement on the efficiency of the smelter. The charcoal used was from a local small producer. It is all oak, and comes pre sized to very even 1" pieces. This fuel is also extremely dry - so the weight per standard pail is a bit less (at 3 lb 12 oz). Neil has suggested that we start to measure volume as well as weight (basically density).
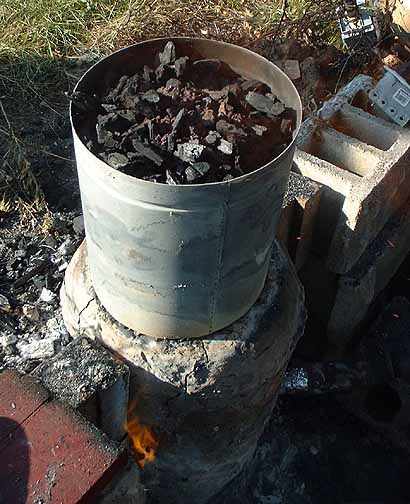
Showing the top of the smelter with a fresh charge of ore.
This is the THIRD firing of the clay cobb furnace, and the smelter itself seems to have stabilized.. There is a single crack on the front face that could use repairing, but other than the expected breakage around the tap arch, the smelter suffers hardly any damage at all. The ceramic tuyere also is almost totally intact. This was the second use of it, and it appears ready for yet another firing. As Skip had suggested, the clay sinters and then gets coated inside with a layer of slag at a stable shape. These two factors certainly appear to be protecting the smelter at a stable configuration - again as he suggested. For this firing I did nothing other than work three bricks in to form a larger tap arch.
For the Monday smelt, I gathered up all the slag from Sunday and re-cycled it through the smelter. Intentionally, I used a volume of this 'gangue' as the initial charge - to allow this material to establish the new slag bowl bottom. This seems to have worked well. I then charge the ore I had on hand. There was roughly 20 lbs of pre-roasted Virginia Rock Ore, which did have to be crushed. Once this had been added, I used the balance of the gangue material from Sunday, to a total of about 20 lbs.
Working on Mike's latest brain storm, I started charging in fairly large amounts - and kept it at that level. I was using considerably more air than we have used in the past. The 'theoretical' amount for this 25 cm diameter would be between 600 to 900 litres per minute, but the air rate was set to roughly 1050. I had a solid consumption of roughly 4 lbs charcoal every 8 minutes (see the notes). I charged ore at 3 lbs per pail and the gangue at 2.25 lbs. I kept the gangue a bit lower than the ore as the pieces were larger and figured (correctly) that they would take longer to heat.

Showing the first 'self tapping' of the smelter
What Skip calls 'Happy Slag' self tapped latter into the sequence - about when it should. The slag was dense, black and fluid - all the signs of a good iron rich slag. This was also re-cycled. I had absolutely no problem with blockage of the tuyere through the smelt.
For extraction, I burned down the charcoal to just above tuyere level and then clear remaining charcoal and thump from the top. The size of the bloom suggested it would be pretty hard to extract from the top. So I pulled the bricks and dug out the base of fines. By then thumping from the top - the bloom pretty much popped out the bottom. Even working alone, the extraction was very easy. I might suggest that at least for a slightly smaller bloom - clearing the base and then thumping the slag bowl down certainly appears to make extraction a LOT easier.

Showing the cleaned bloom with partial cutting
The biggest challenge was trying to compact the hot bloom working alone!
I got a classic bowl shape to the bloom, about 6 inches across and maybe 3 inches thick. It proved easy enough to knock off the attached slag and mother to clear the iron. I did work it over with a hand hammer to at least get rid of the really loose stuff. I started to cut - using my bloom axe in my left and a roughly 5 lb sledge with one hand (not very well!) I got maybe a third of the way down before the bloom was just to darn cold. Again thanks to Mike for the idea of using the green wood stump. I could never have held the bloom to an anvil working alone.
The finish weight is roughly 15 lbs. Note that this was off my fishing scale so only an approximation. I'll take it into town today and see if I can use the Post Office scale. This appears a very nice, classic bloom shape. Feels pretty dense. I will spark test it latter today and get back to you on the actual weight and guesstimated carbon content.
For a report on this Monday smelt (the raw experimental data) you could go to :
www.warehamforge.ca/ironsmelting/1106B-data.html
Darrell


No comments:
Post a Comment