" Can you turn me on to some information regarding techniques I need to start forging layered blades. ... What {alloys} do you recommend and how many folds do I need to attain the proper bond before I forge the third steel to the others. I know 512 layers is the damascus requirement and need your advice on the specifics. Are you thinking about making a layered bladesmithing video? "
I started working on a new DVD - 'Basics of Layered Steels' back in winter of 2007. I own a VHC camcorder (and a half decent one). I shot about 2 hours of rough footage, some of it of objects now sold. It turned out the tracking is off on the camera and all the footage has a fold line through it and flips regularly. Not at all suitable for conversion to an educational program. And to top it off, no one will work on a 15 year old camcorder.
I have bought three digital cameras over the last year. All with problems - the last was a new Canon, but the power system completely crapped out mere days after the warranty period. Will cost as much to repair as to replace with a brand new one.
So the long and short is that I was working on a program on Layered Steels - but the whole thing is on hold pending equipment.
Josh's request shows some pretty typical misconceptions about layered steel. Much of what is written is incorrect or misleading. In one especially well known series of books on the topic, what is MISSING is more important than what is included. Too many smiths have taken the approach of framing their descriptions of their own work as mere advertising or even mysticism - merely to make for better sales!
As an initial starting point, take a look at my information on the Wareham web site (although elementary). I have also a number of past blog postings on various layered blades I've made over the last couple of years. (try searching under 'bladesmith' and 'knives')
Ok - this is the very quick (!) basics:
- the hard layer gives the cutting edge (durable but brittle)
- the soft layer gives the flexibility (soft but bends)
- the net result of adding soft to hard is to effectively REDUCE the edge holding - a straight mono blade of high carbon will always keep the best (hardest) edge, but at the risk of being too brittle.
- three layers of soft / hard / soft may prove the best balance of edge and durability (but its boring to look at)
- when welding, typically your outside surfaces should be plain mild steel. It takes more abuse, and is the cheapest material
- number of layers is only critical in terms of decorative effect. Low layers have few lines, generally less interesting visually
- remember that layer count goes up EXPONENTIALLY. A 2000 layer blade may only be one more weld from a 500 layer one
- remember that work effort should be counted by number of welds, not number of layers.
- extremely high (plus 1000) layers will suffer from 'carbon migration' effect (layers in effect blend together)
- I * personally * find the nicest patterns at about 250 to 500 layers (depending on method) - so 4 / 5 welds
- PATTERN WELDING (museum definition) is applied to twisted rod method (Northern European)
- variations in metal content react differently to acids, so are chosen for decorative effects
- etching can give two effects, shift in height (typically Nitric or Sulphuric) and shift in colour (typically Ferric Chloride)
-acid chosen may be determined by metal alloys in the mix
Personally, I tend to stick to the following construction:
-starting pile at between 9 - 13 layers (9 most typical) I usually have a long piece of mild steel in the centre as a handle
- I still like to wire the piles together for welding (just old fashioned I guess)
- two weld / draw sets - to about 50 layers
- at this point twist rods that will make up the back of the blade
- two layered blocks are welded to a piece of high carbon (for the cutting edge)
- Weld together edge and back pieces for the billet
- use L6 (.5% stainless about .5 % carbon) for decorative effect (produces thin silver lines)
- use wrought iron (antique) for decorative effect (produces 'rope' texture)
- etch first in Nitric, which changes heights of metal layers (topographic etch)
- etch second in Ferric, which brings out extremes of colour (surface effect only)
You can see a number of my past blades using layered steel HERE

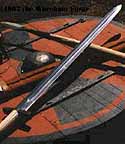
The images are of my last blade commission (April 2008). This Viking Age man's knife is a typical seax type. Blade length is about 5 inches. The handle is a simple section of caribou antler.

The blade is pattern welded. In this case there are three separate twisted rods that make up the back. The edge is formed of two additional blocks welded to a high carbon core. The total layer count for the blade is 261.
I started with a pile of 13 plates. The mixture contains Mild steel / L6 / High carbon (1095 file) / wrought Iron:
M/L/H/L/M/I/M/I/M/L/H/L/M
With the central mild steel layer extending as a handle for the billet. You can see that 5 out of the 13 plates (actually about 50% of the material) is comprised of mild steel.
First weld - 13 layers (draw, cut to 4)
Second weld - 52 layers (draw)
At this point 2/3 of the bar was twisted in three sections, then cut
The remaining 1/3 was drawn, cut in half and matched to a carbon steel core
Third weld - edge at 105 layers
This was then forged to match the three twisted bars
Fourth weld - 261 layers
Forge to blade
As I have mentioned in other posts here, I have taken to making my knives using this method of a separate carbon steel core for the cutting edge with additional twisted rods forming the flexible and decorative back.


No comments:
Post a Comment