Jake has also produced a beautiful web site, wonderful graphic layout with high quality images throughout. This morning I was pointed to a photo essay he has created, detailing the creation steps on the metalwork for a Composite Pattern-Welded Viking Sword:
The direct link to the full article : Go HERE
(Please go take a look, then come back)

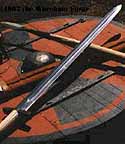
This is the completed sword. The blade is composed of two, 7 layer twisted core rods, with a 12 layer edge wrap. As with all Jake's work, cast bronze furniture and matching carvings on both hilt and scabbard finish the work.
I wanted to point out a couple of things from the working sequence:

You see the two prepared core rods in this image, ready to be stacked and welded to make the full billet for the blade. Jake has welded a flat stack at 7 layers. I normally start at 9. Note to those who think this is mystic! To effectively weld the starting block, you ideally want a pile as high as it is wide, and roughly 4 - 5 inches long. The length is what you can effectively weld in one heat. Balancing the width and thickness means you get uniform heat penetration - thus a solid weld. Turns out that (depending on plate thickness) this starting stack will be from 7 to 11 pieces, with 7 to 9 being most common on the artifact blades. Believe its 'lucky seven' or 'nine for O∂in' if you want...
But the real point: Jake has twisted his core rods as squares. I personally have taken to running a fast set of hammer stokes down the edges of the twisted rods to convert them is rough octagons. I find this makes for less problem with tearing the corners during the tight twisting. Also I find this method is less likely to result in diamond shape voids in the welded billet (spaces from the overlap of the twist).
I mention this, but Jake's results speak for his control of his technique!

I wanted to include this image here, as it is quite interesting. Jake has forged the edge wrap as a single piece, and fitted all the pieces together. These are being held in place with a forged and fitted heavy metal collar. In the image, he has made at least two of the series of 'travelling welds' down from the tip of the billet that join the four pieces together. You can clearly see the borax flux 'downstream' from the last weld location. That the metal remains so clean suggests the use of a gas forge (Dark Side of the Forge!). There is amazingly little compression or distortion of the welded areas, which makes me think that Jake may be using the hydrolic press he mentions for the weld (or maybe he is just a heck of a lot more precise than I am!).
Again, you can only effectively weld at best 6 inches of material in a single heat cycle. As Jake runs the travelling weld series down from the tip, he will tap the collar forward. (Scott Langton used this collar method on his reproduction of the Sutton Hoo sword.)
Thanks to Jake for publishing such a clear description of the creation of a pattern welded sword. Would be sword makers are advised to study the article closely, there is a LOT of good information there.
(Images are Jake's, loading direct from his web site.)


2 comments:
Darrel,
Thanks again for sharing so much information with us! I have followed Jake Powning for many years, I even have one of his carving tutorials saved for the day I might get a chance to do some.
Thanks again!
Regards,
Albert
The Rasch Outdoor Chronicles.
The Range Reviews: Tactical.
Proud Member of Outdoor Bloggers Summit.
Stunning gestalt. Rare in a world that pits one form of artist against another.
Post a Comment